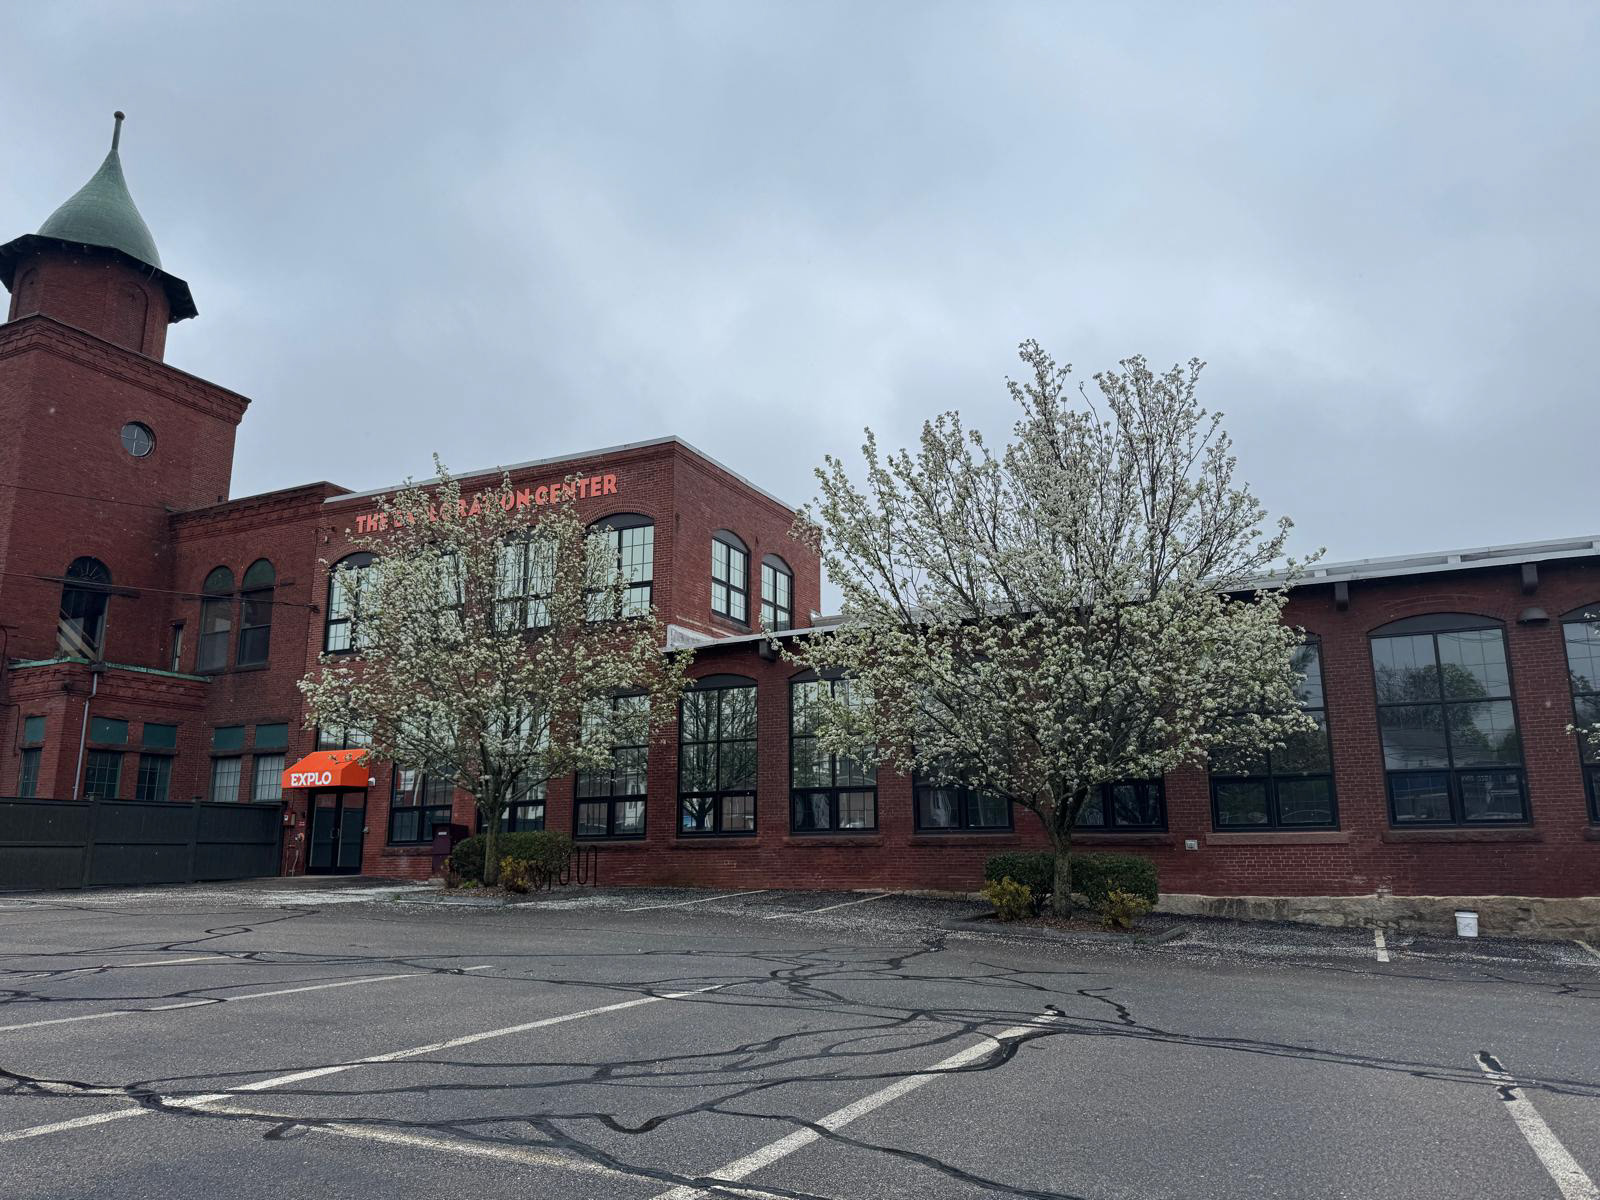
Nestled in the heart of Norwood, this early 20th-century industrial building was thoughtfully transformed into the new headquarters for AURUS Inc.
The project balanced historic preservation with modern functionality, breathing new life into the structure while creating a vibrant, collaborative workspace for a growing team.
The project balanced historic preservation with modern functionality, breathing new life into the structure while creating a vibrant, collaborative workspace for a growing team.
My Role
At AURUS Inc., I worked as an architectural designer and onsite coordinator, leading the 65,000 sq ft restoration and adaptive reuse of a historic mill building into the company’s new headquarters. My role involved designing layouts, details, and schedules, preparing construction documentation, and coordinating closely with structural, MEP, and architectural teams in the U.S. and abroad. I worked directly with contractors and vendors to resolve onsite challenges, researched sustainability strategies and historic preservation methods, and explored new materials while securing quotes to balance design goals with budget. This position allowed me to integrate technical precision with creative problem-solving, ensuring modern functionality while preserving the building’s historic character.
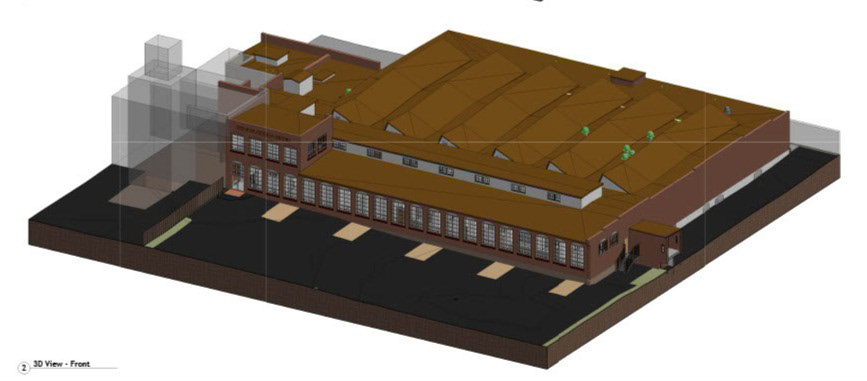
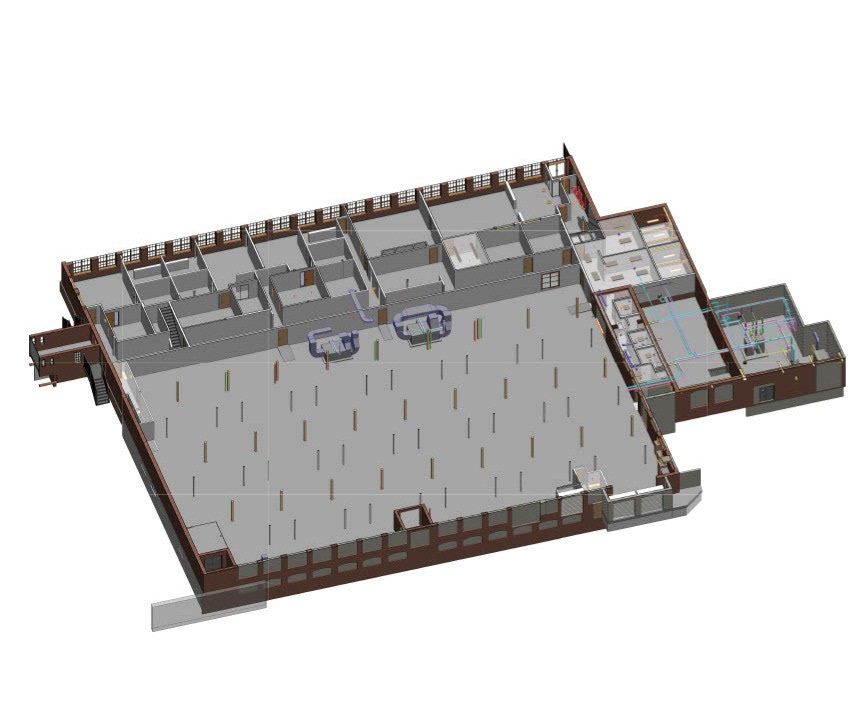
Building Mass
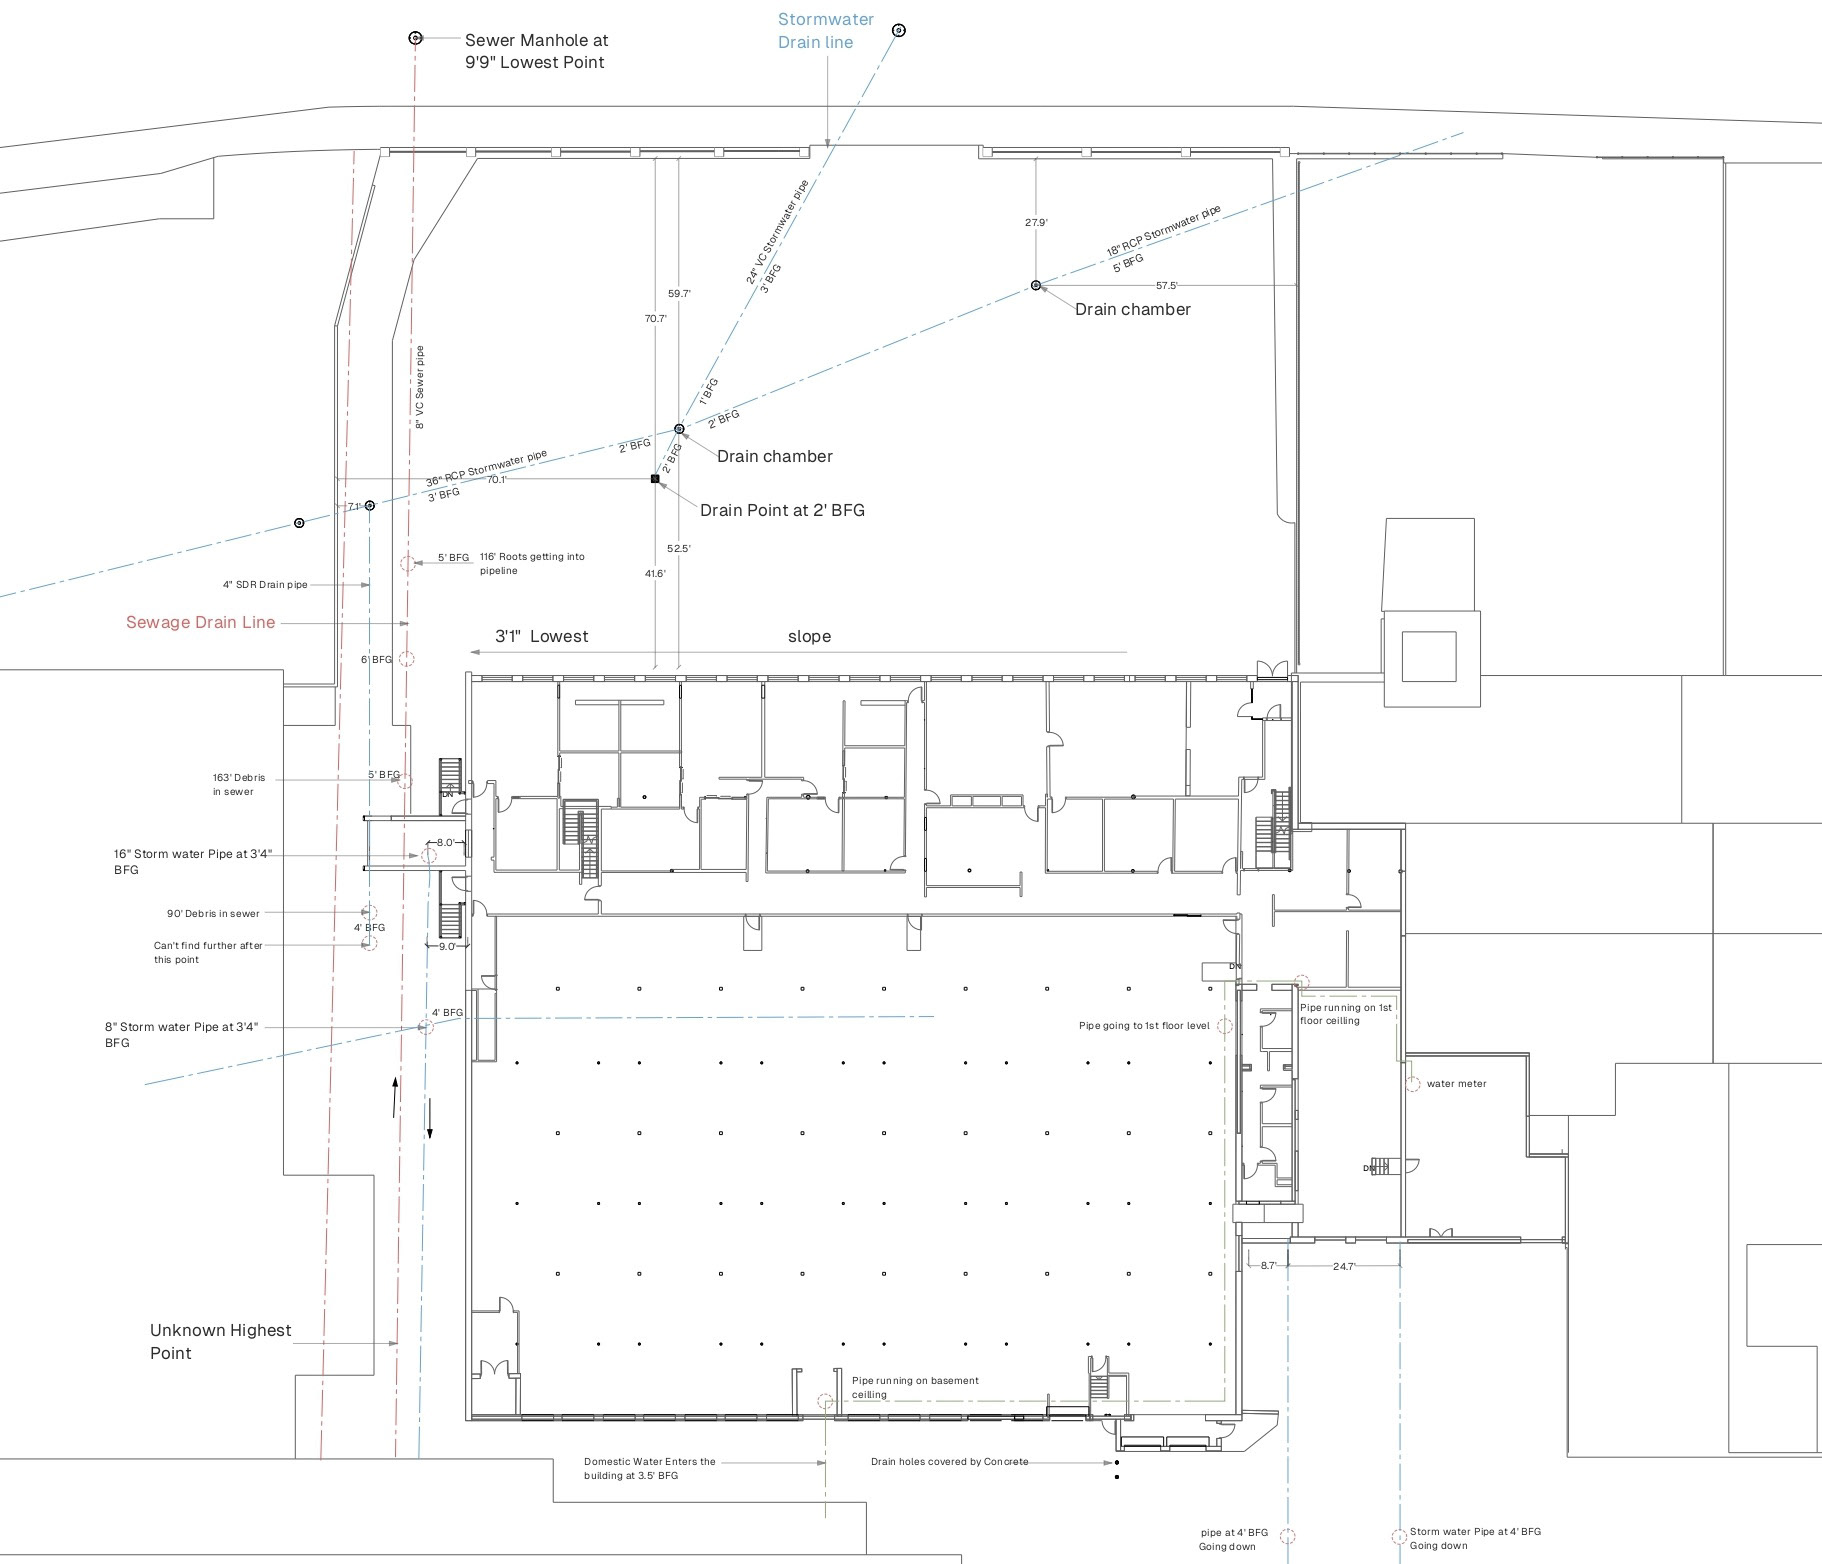
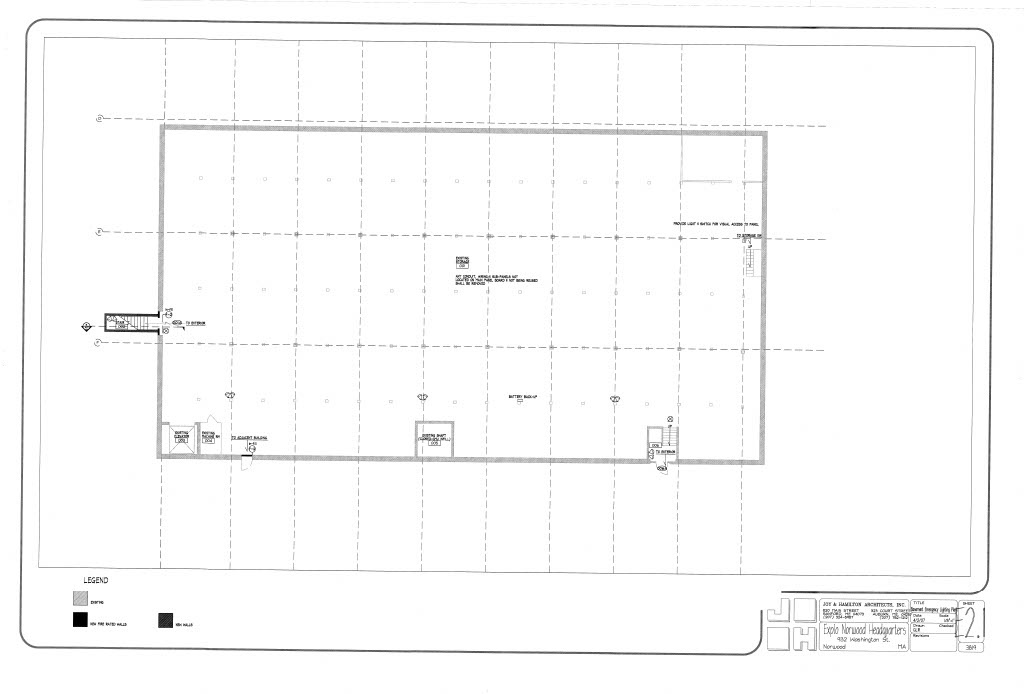
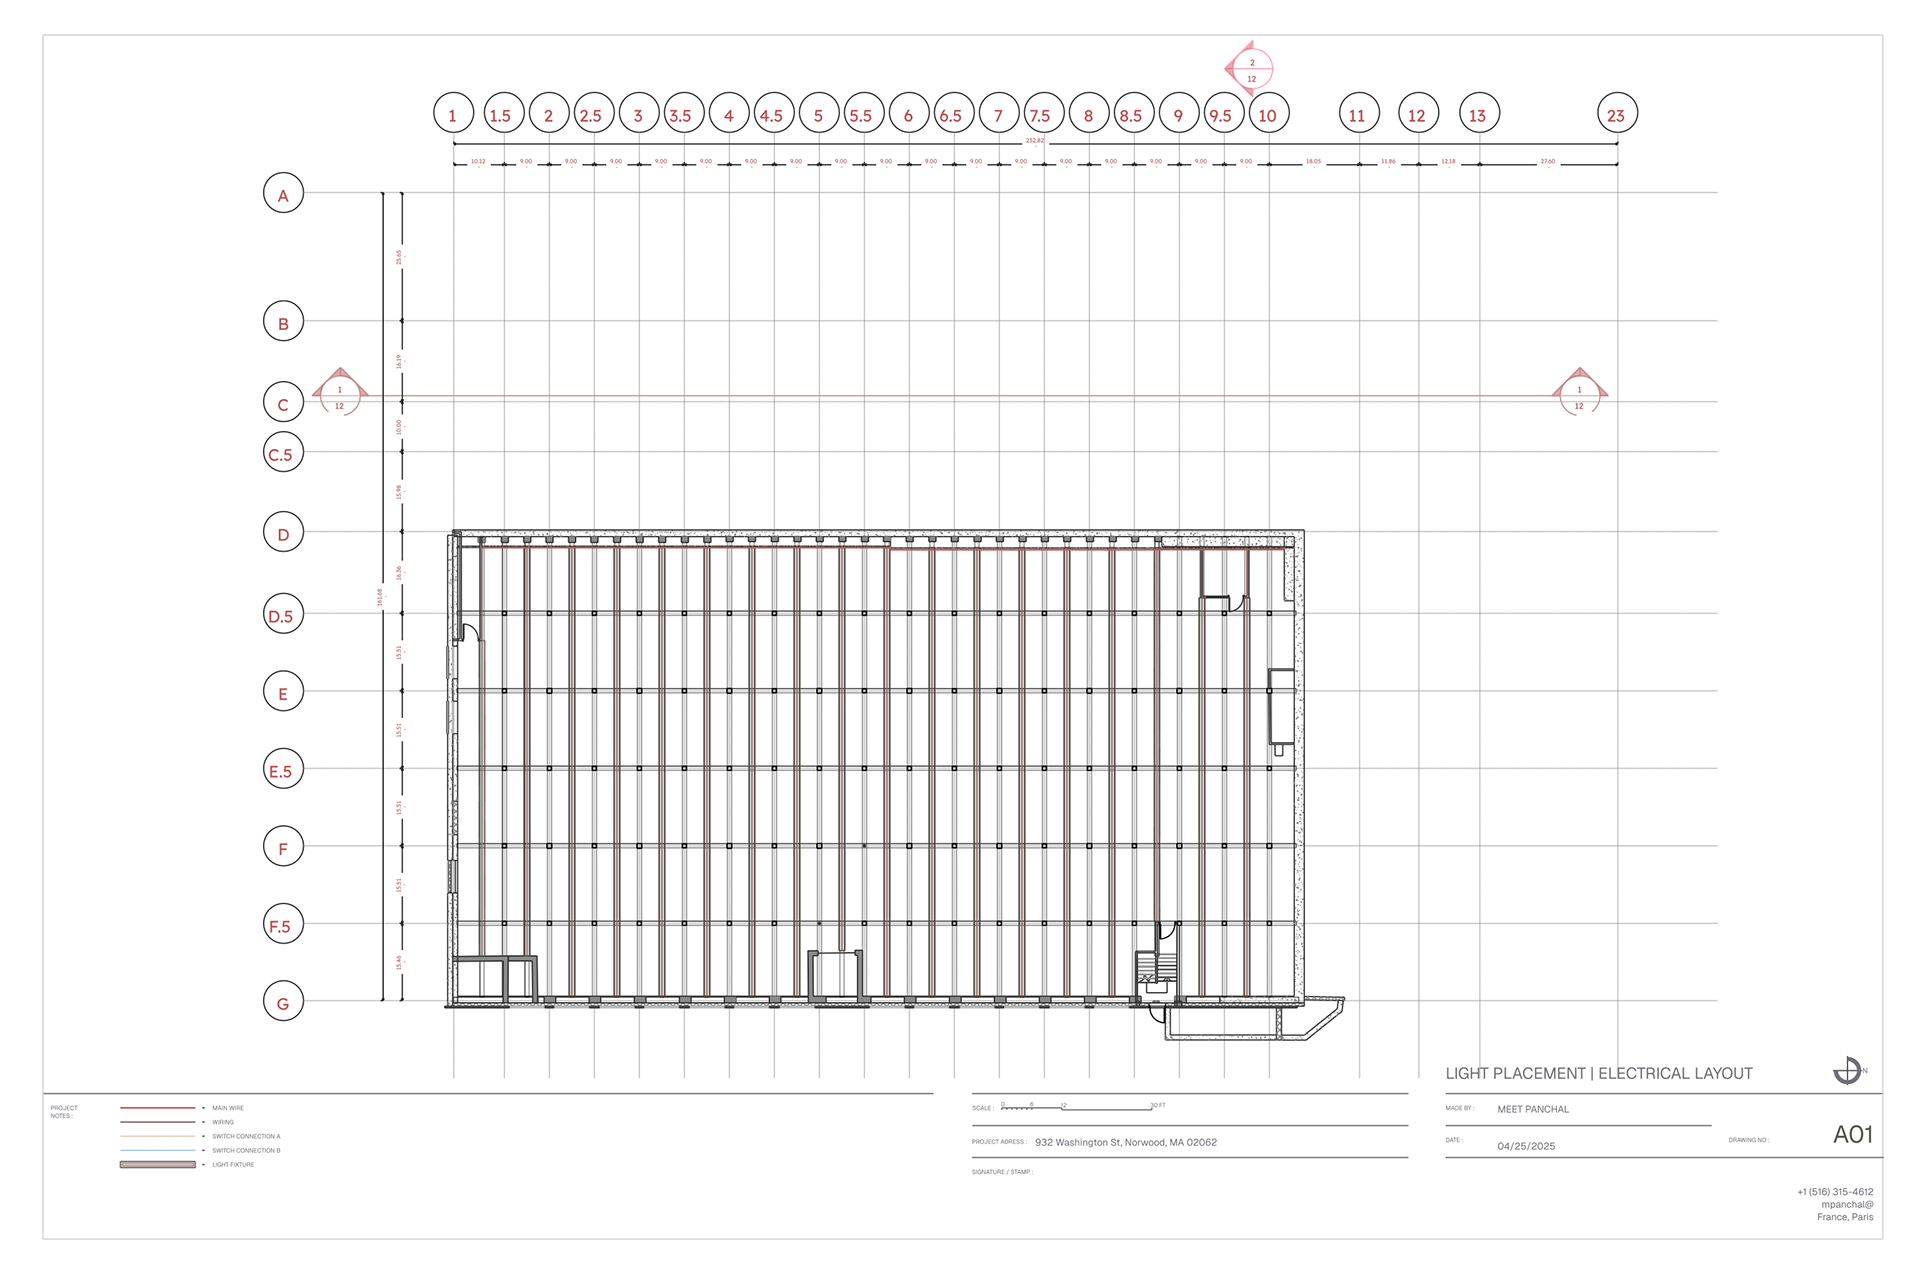
MEP Site Utilities Coordination Plan
Site utilities coordination plan for 932 Washington Street, detailing stormwater, sewage, and domestic water connections to ensure seamless integration with the building’s design
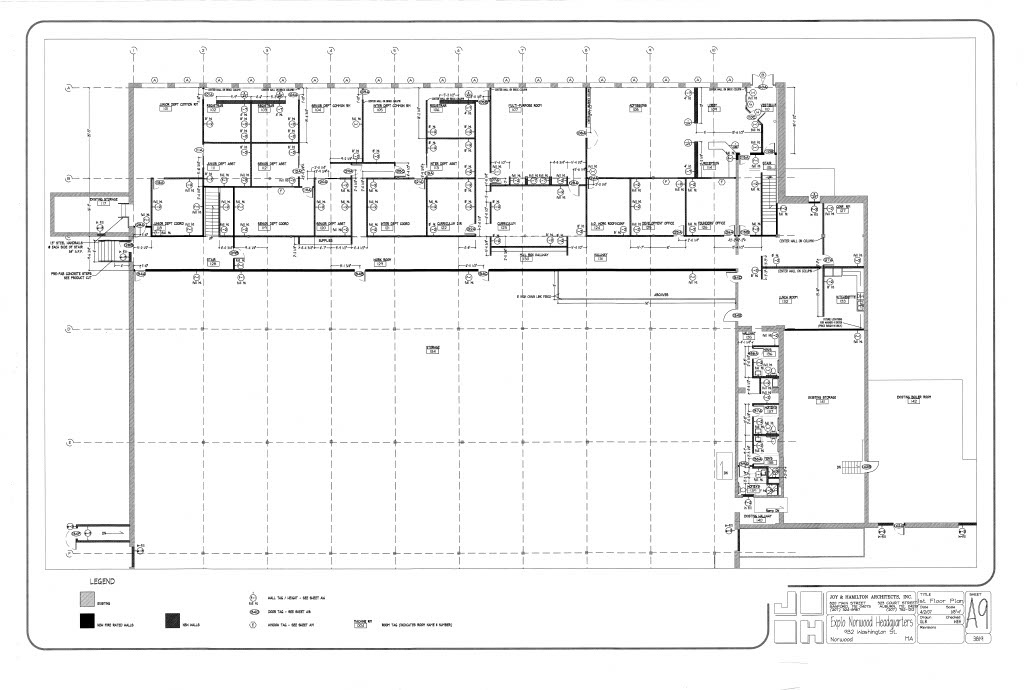
Old Drawings
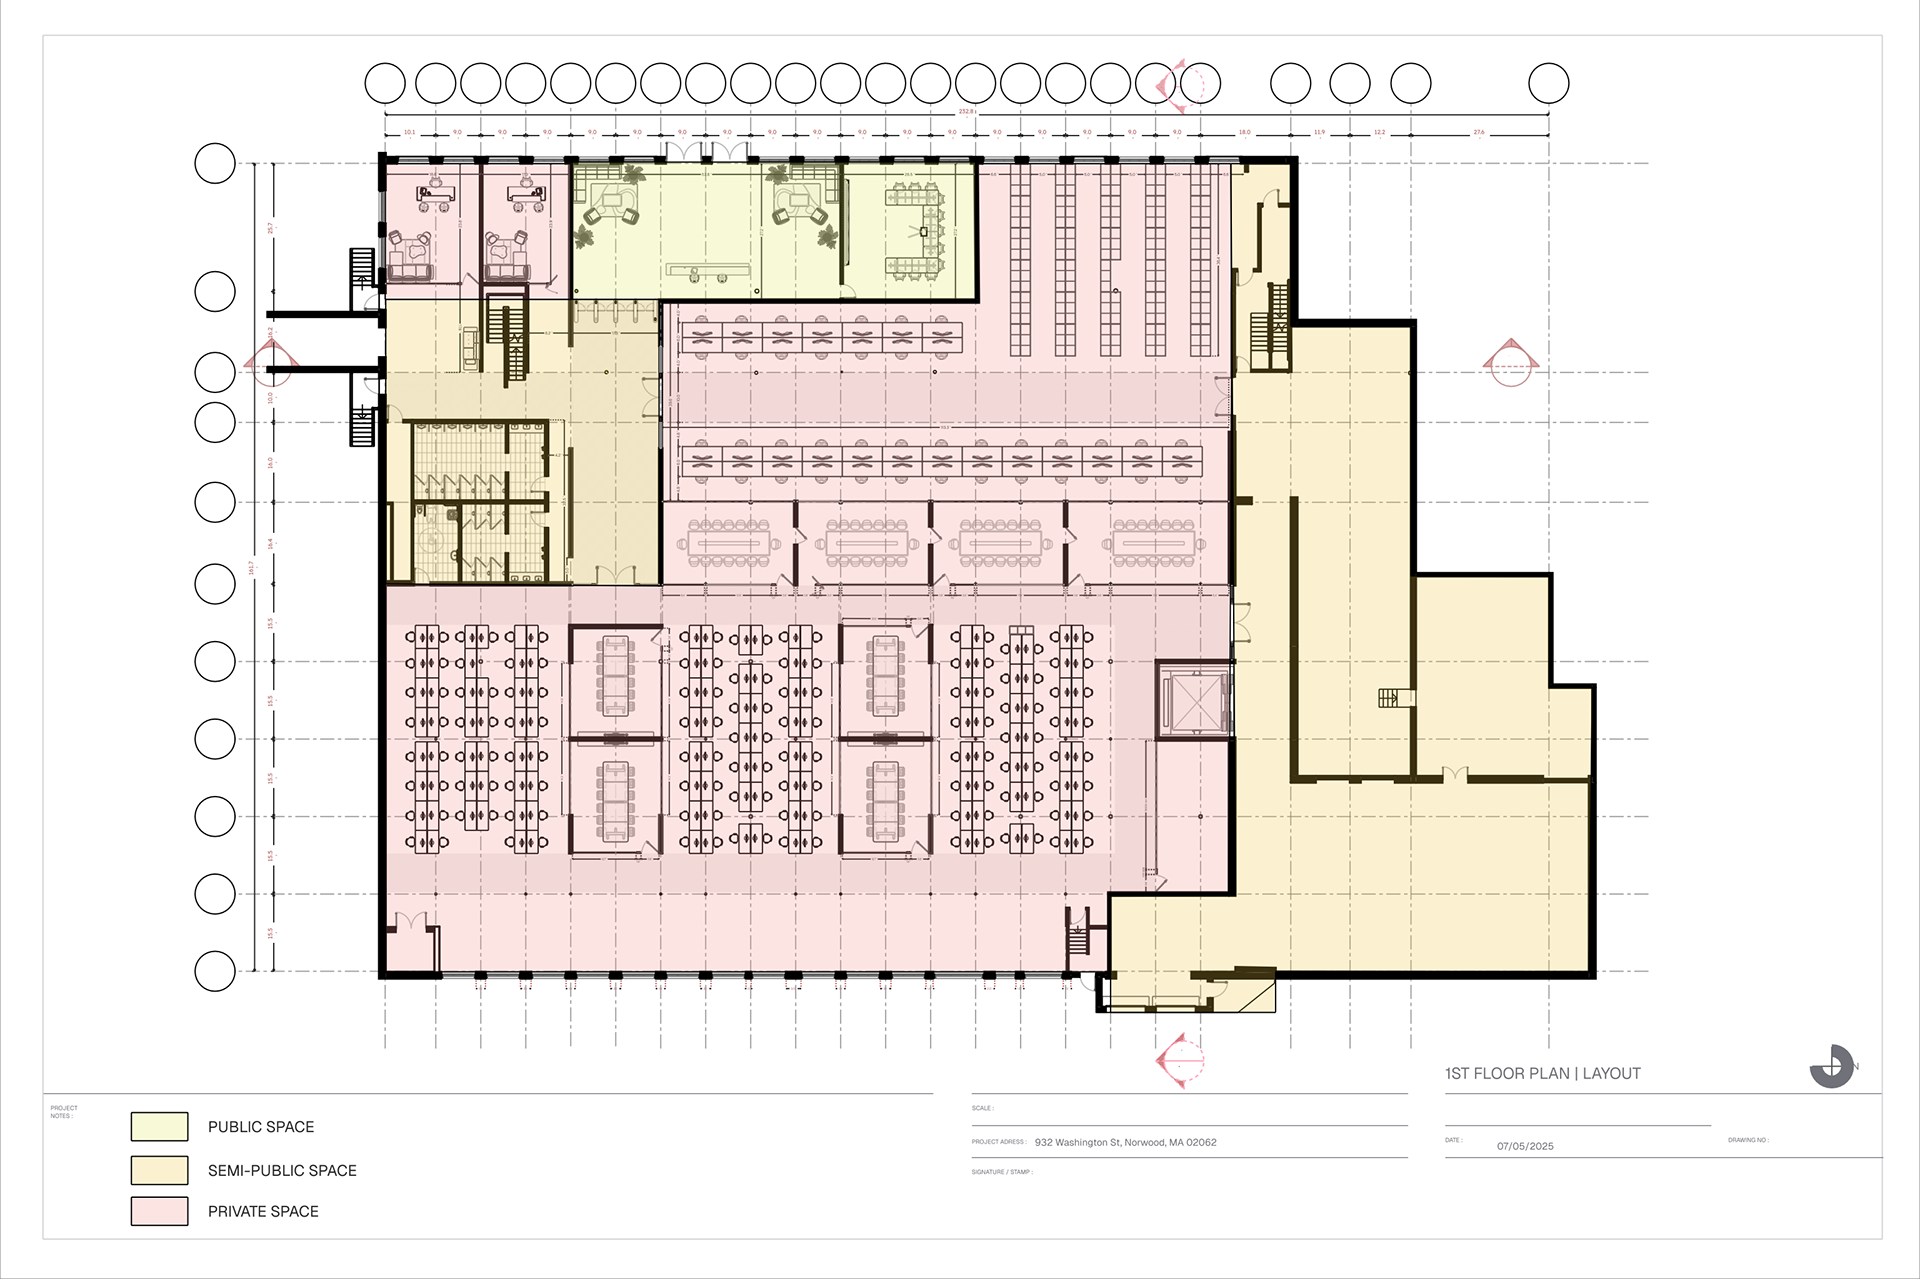
Program Zoning & Material Strategy
The proposed layout organizes the building into three clearly defined functional zones:
The proposed layout organizes the building into three clearly defined functional zones:
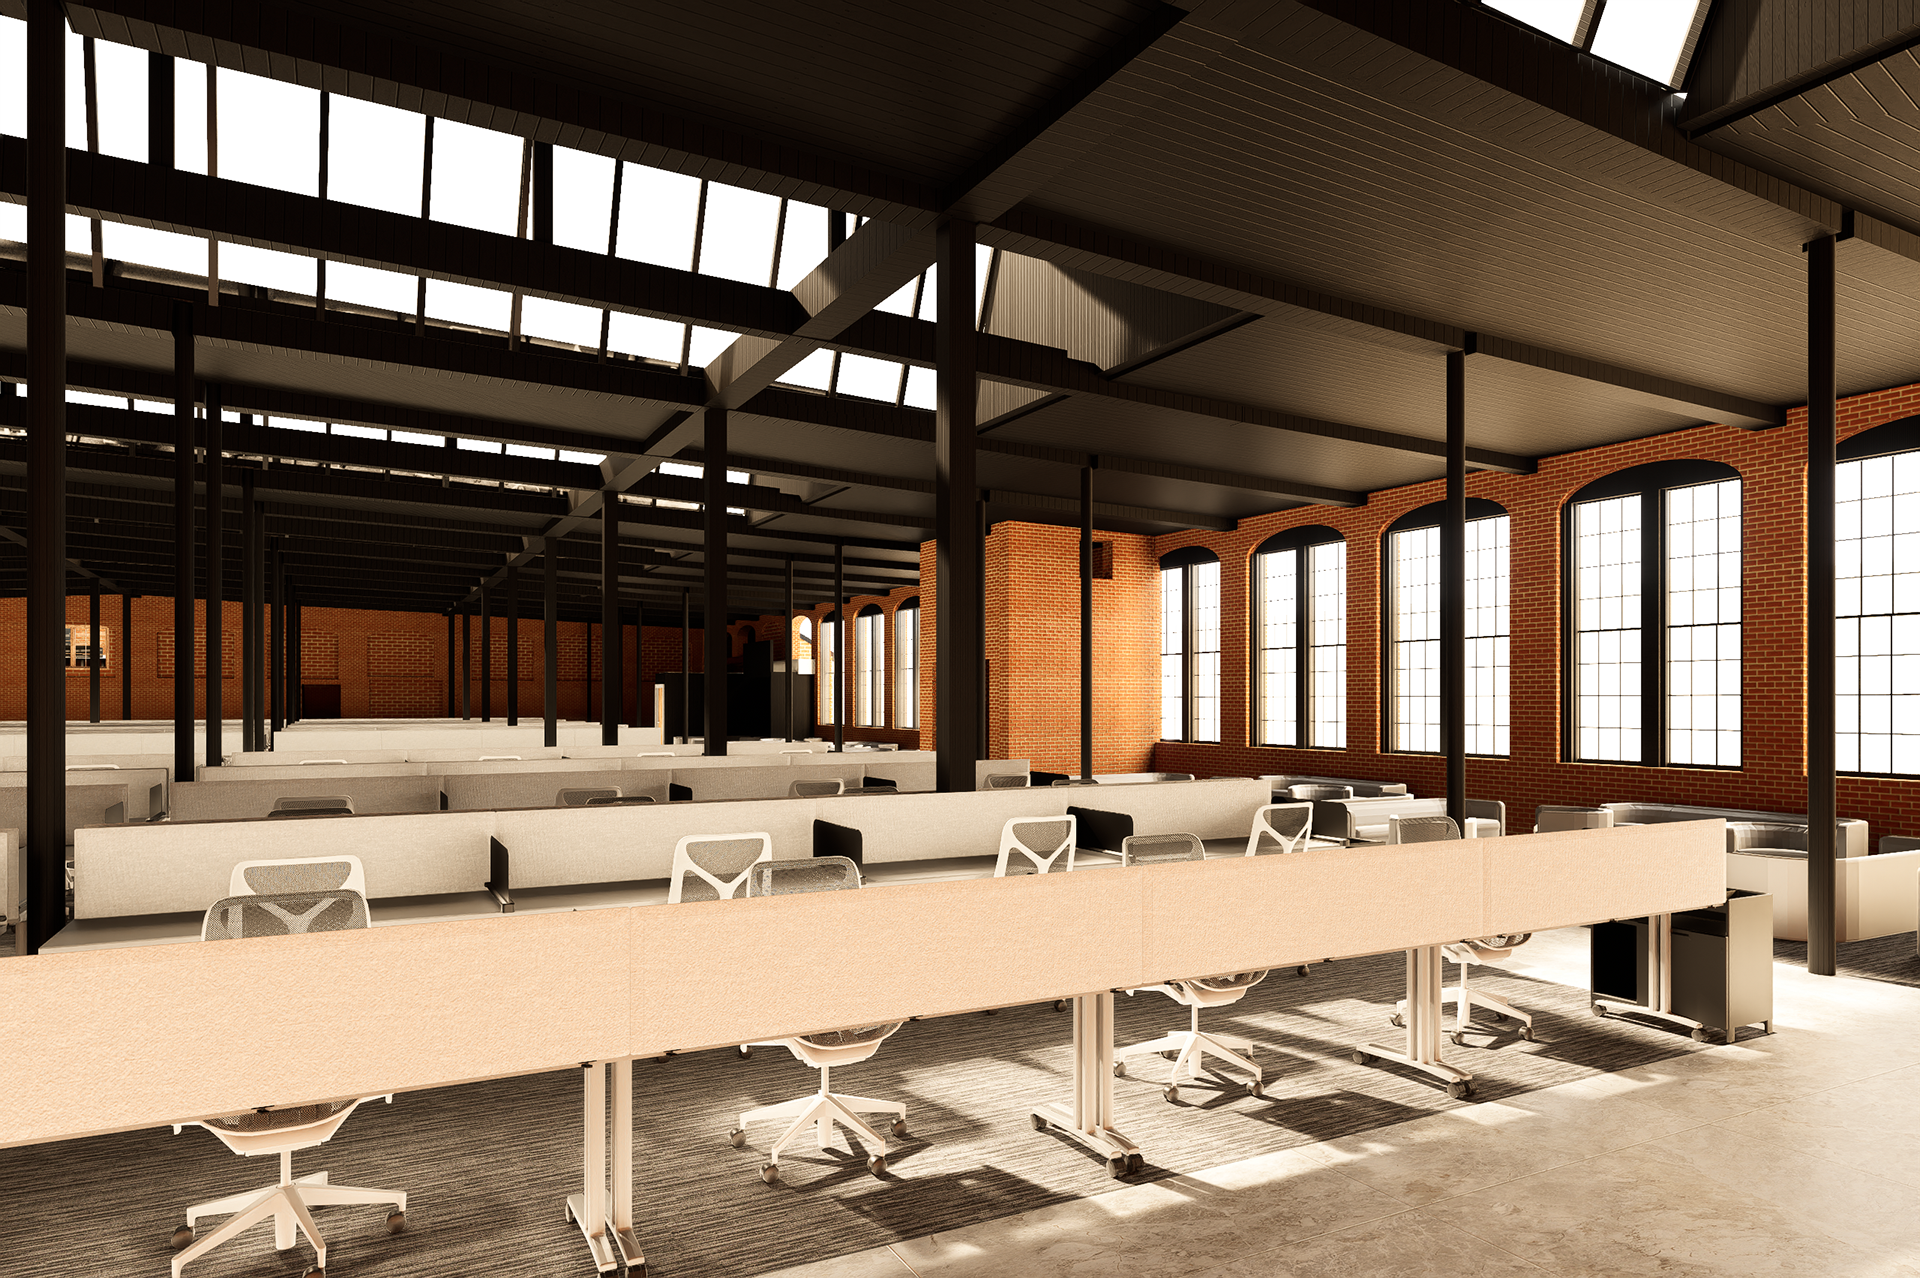
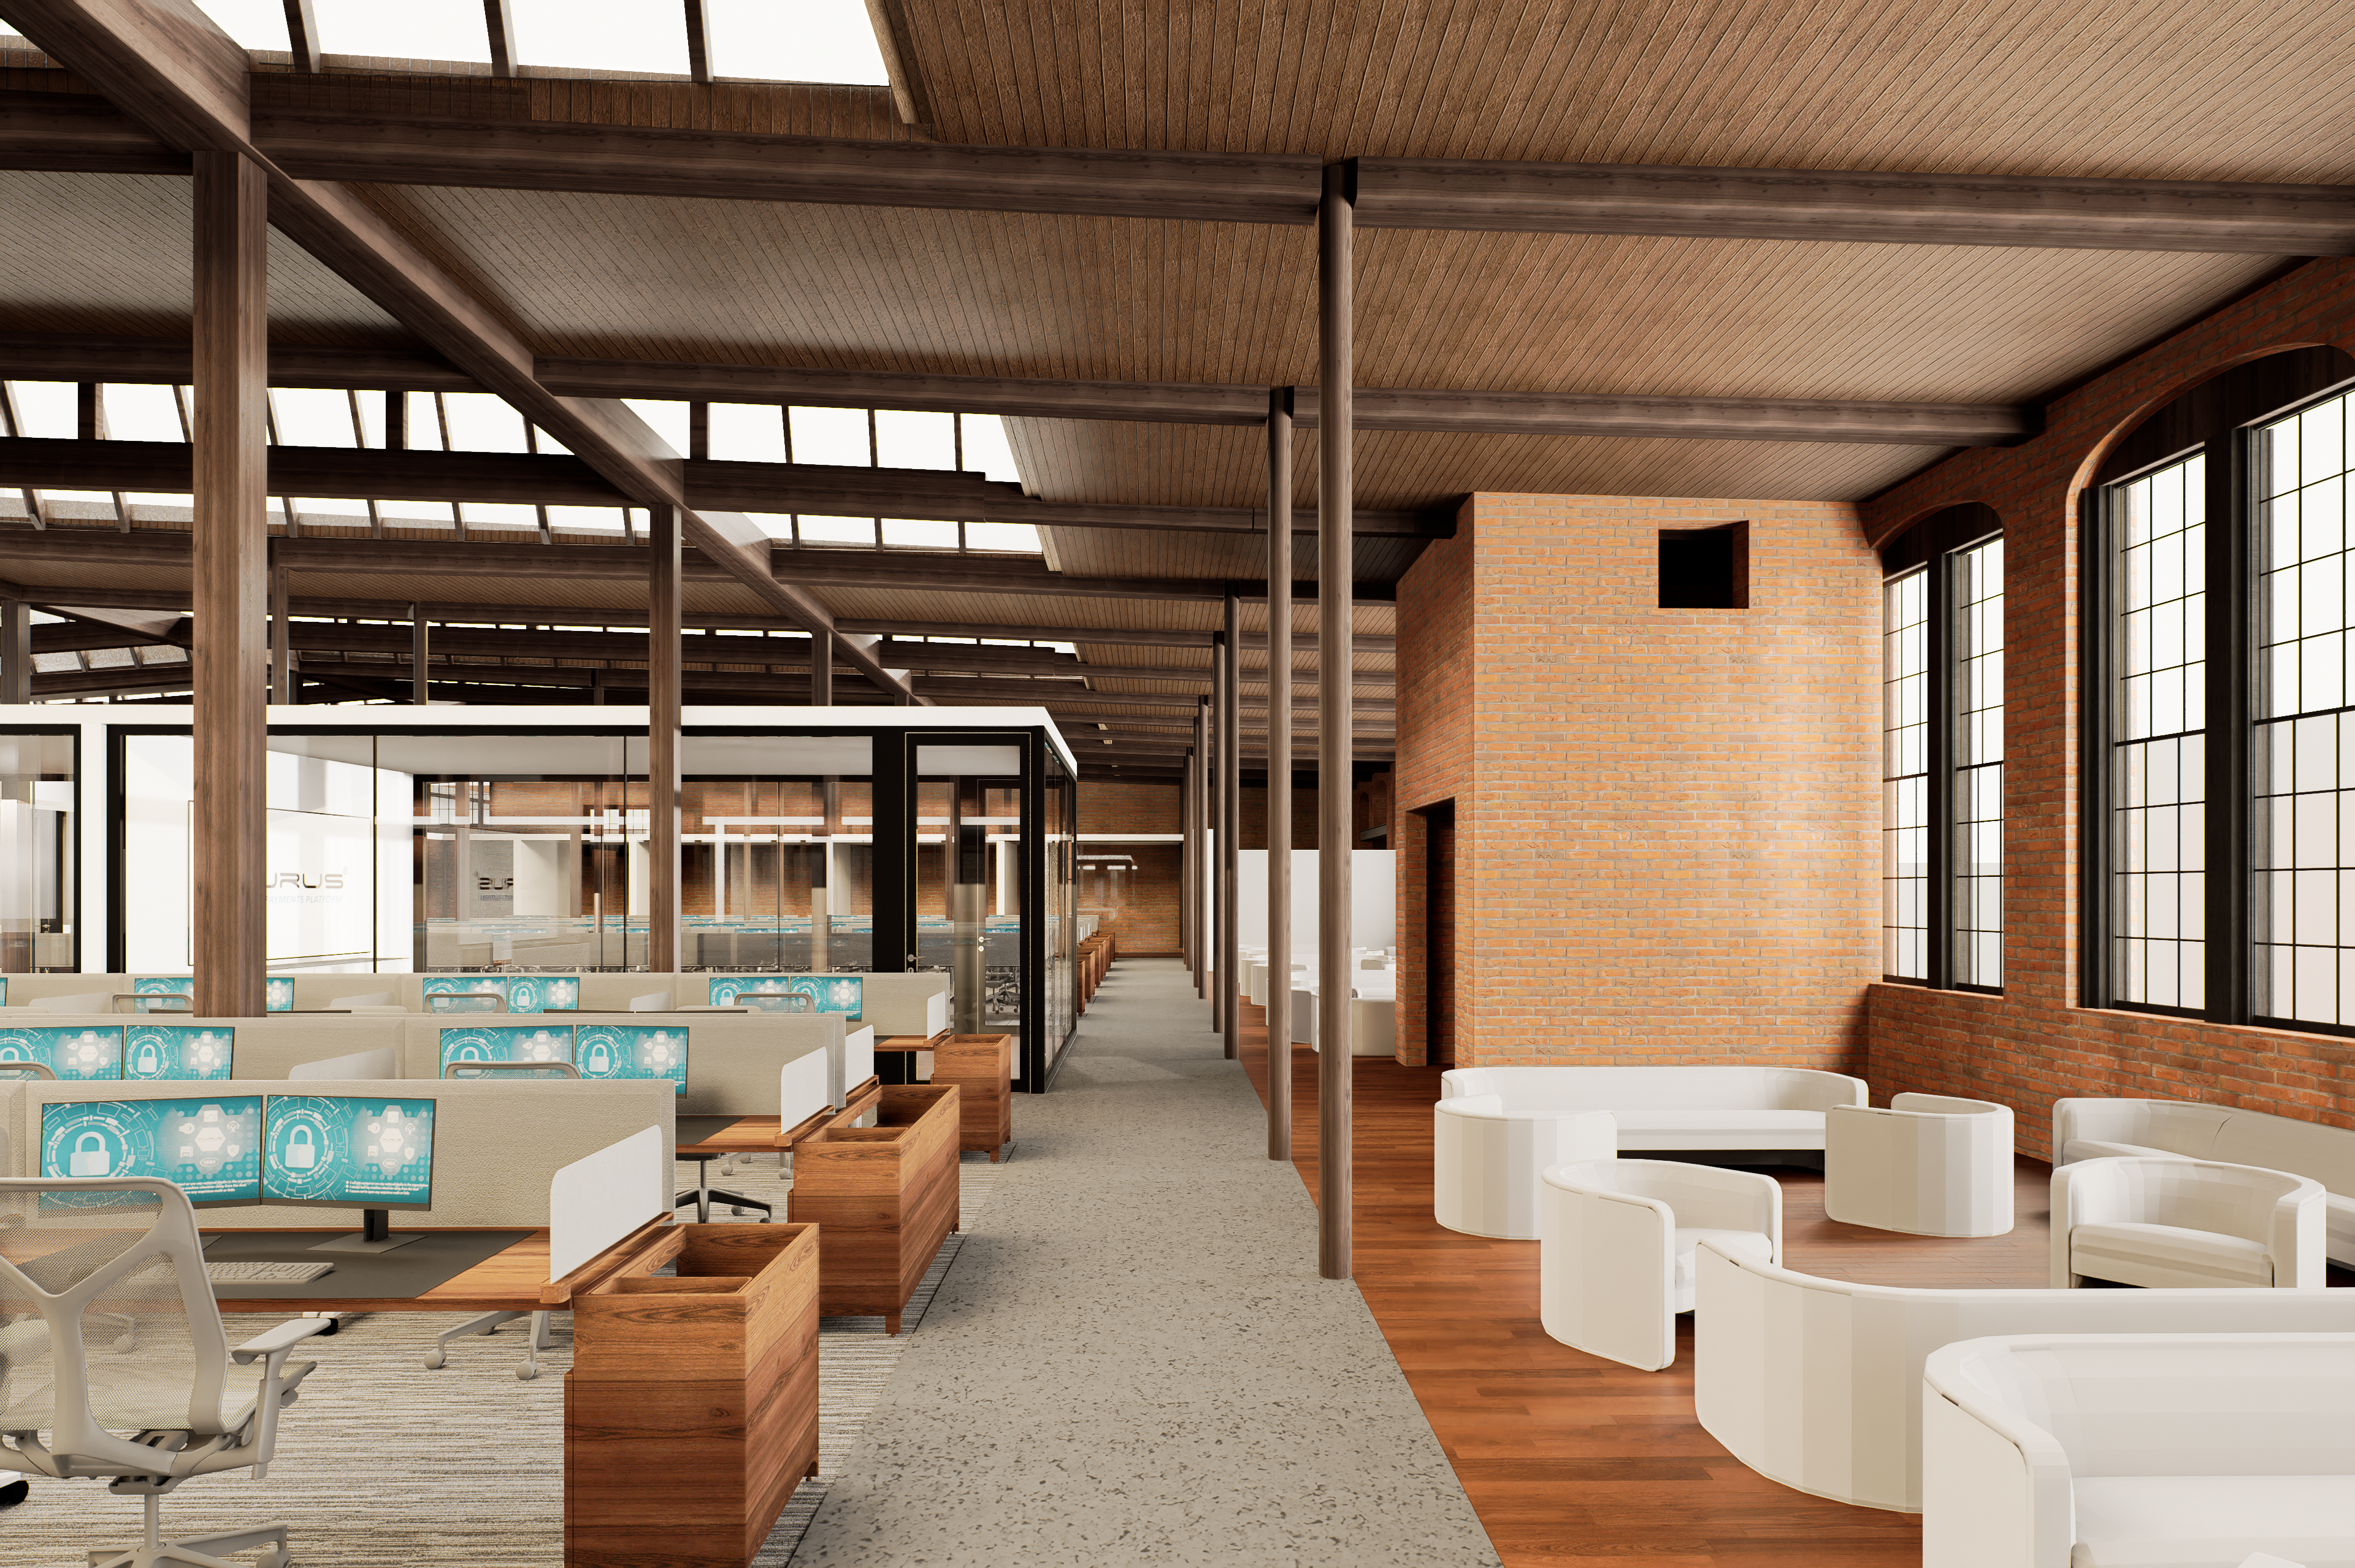
Depot Area—the central hub for storage and operations. Workstation Office Area—an open-plan workspace designed to promote collaboration and maximize natural light. Loading Dock Area—strategically positioned to streamline the flow of goods and deliveries.
The material strategy reinforces these zones both functionally and experientially. Polished concrete flooring extends through the depot and loading dock, emphasizing durability and industrial resilience. In contrast, a raised wooden platform delineates the office area, introducing warmth and tactile richness to balance the space’s utilitarian core.
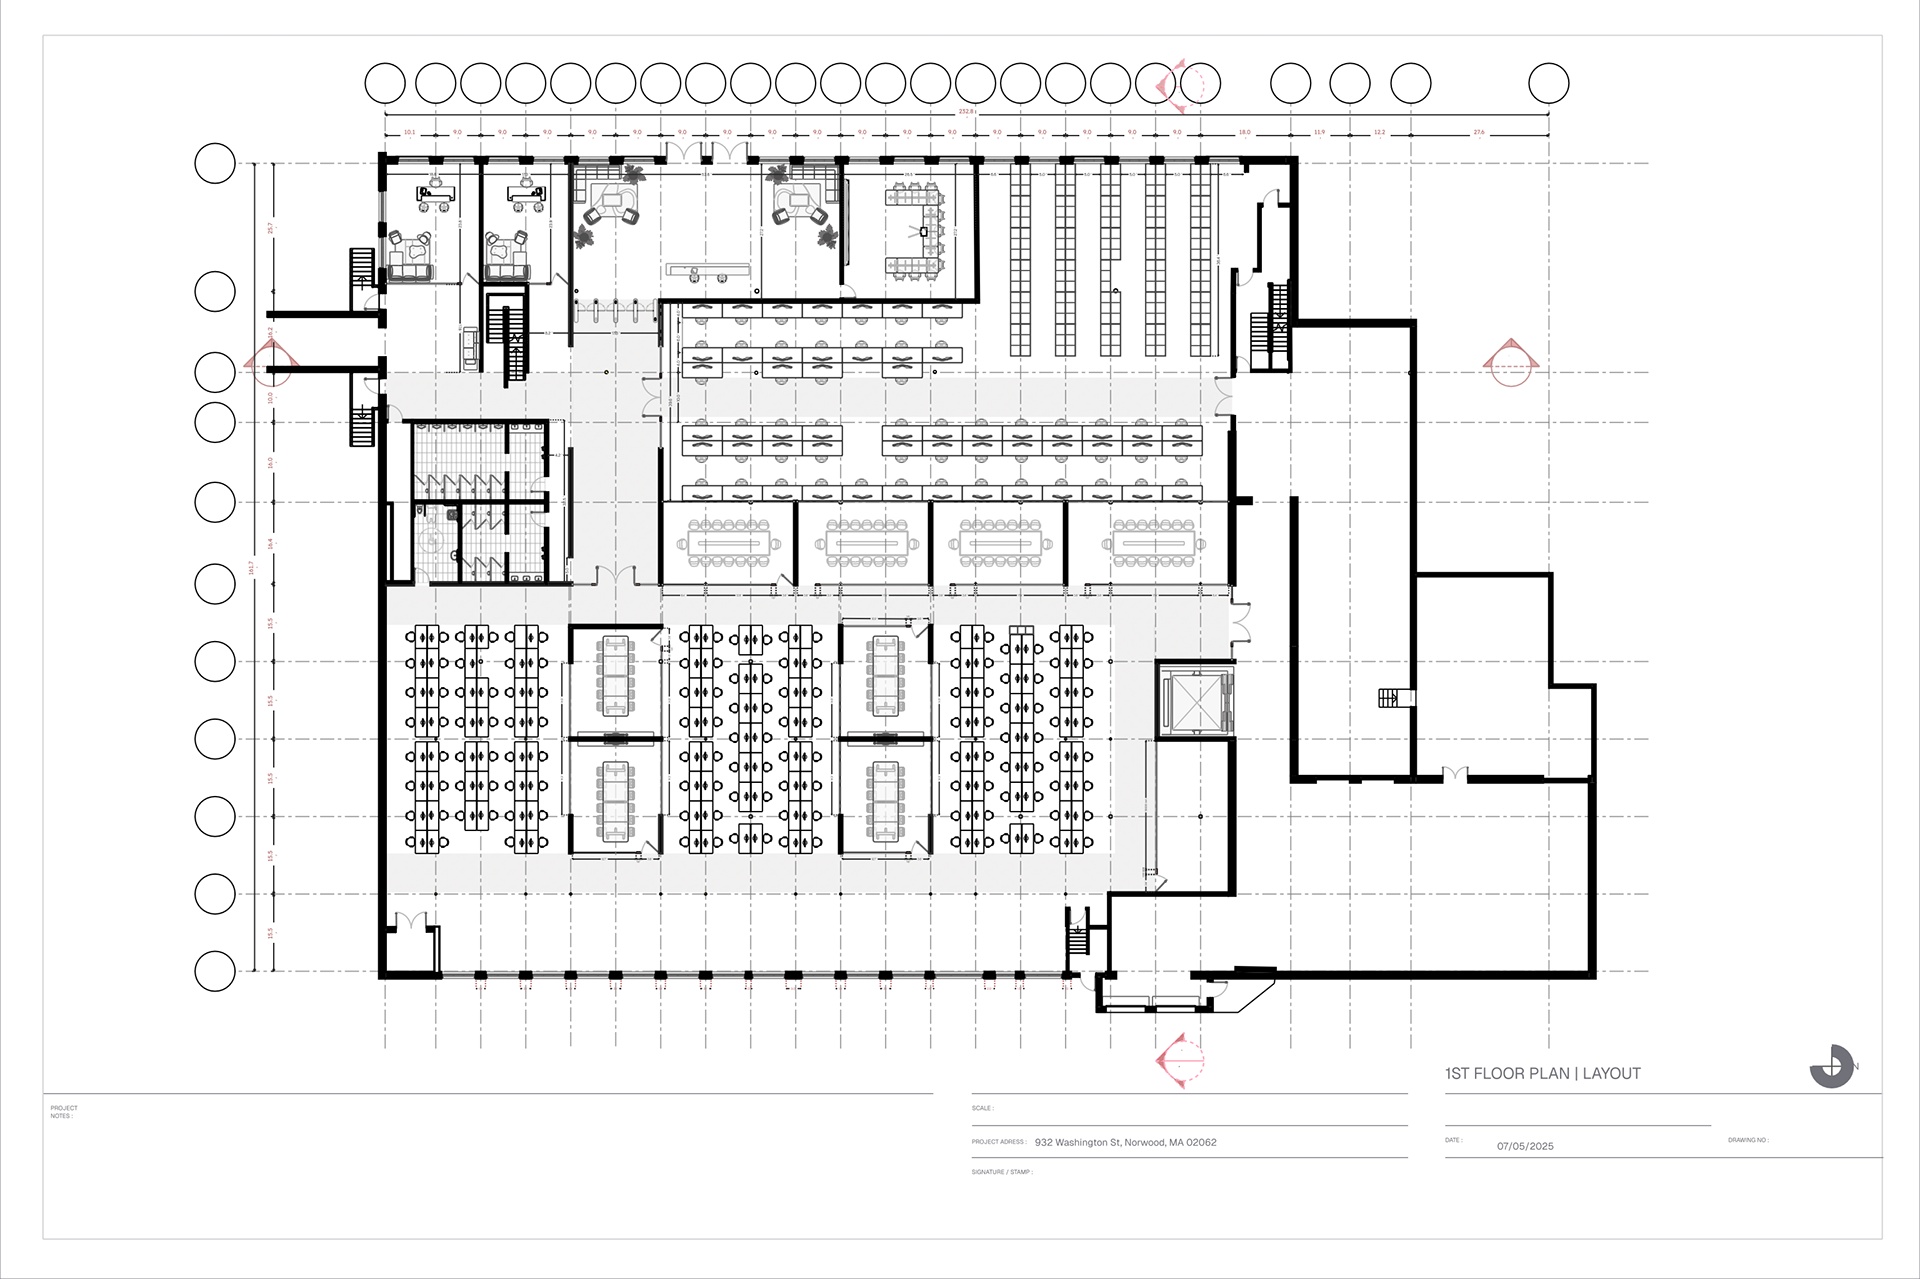
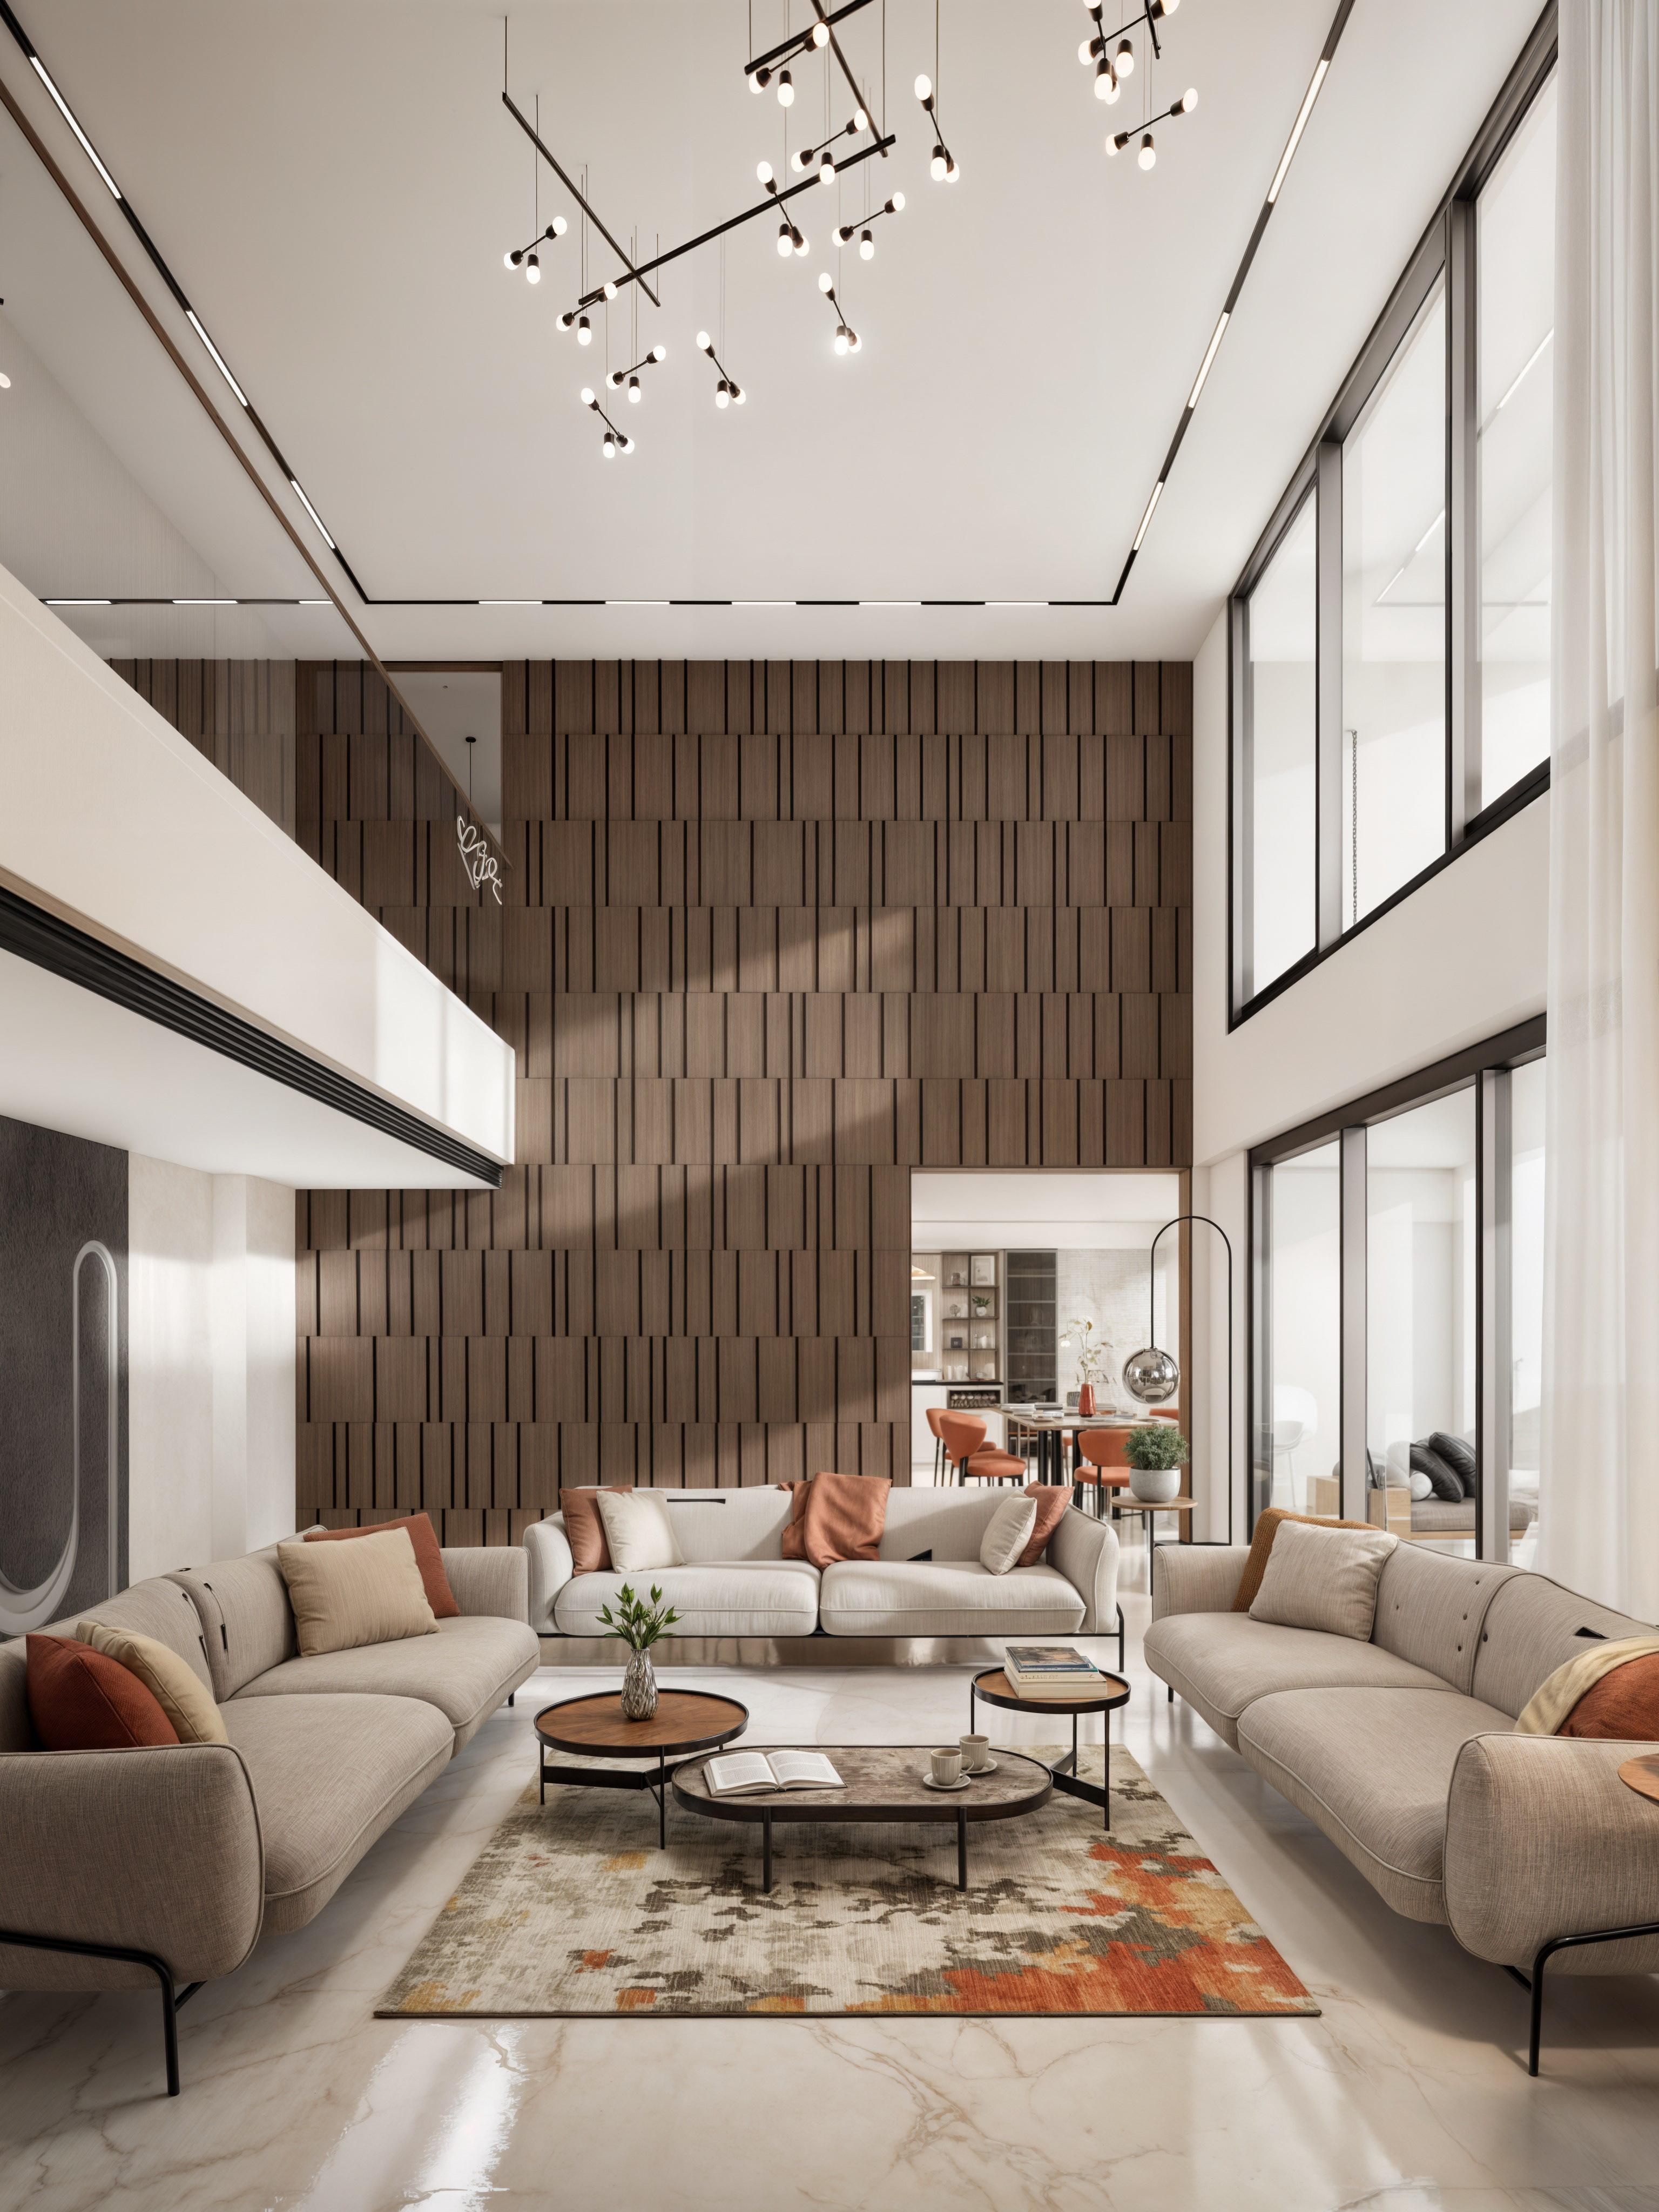
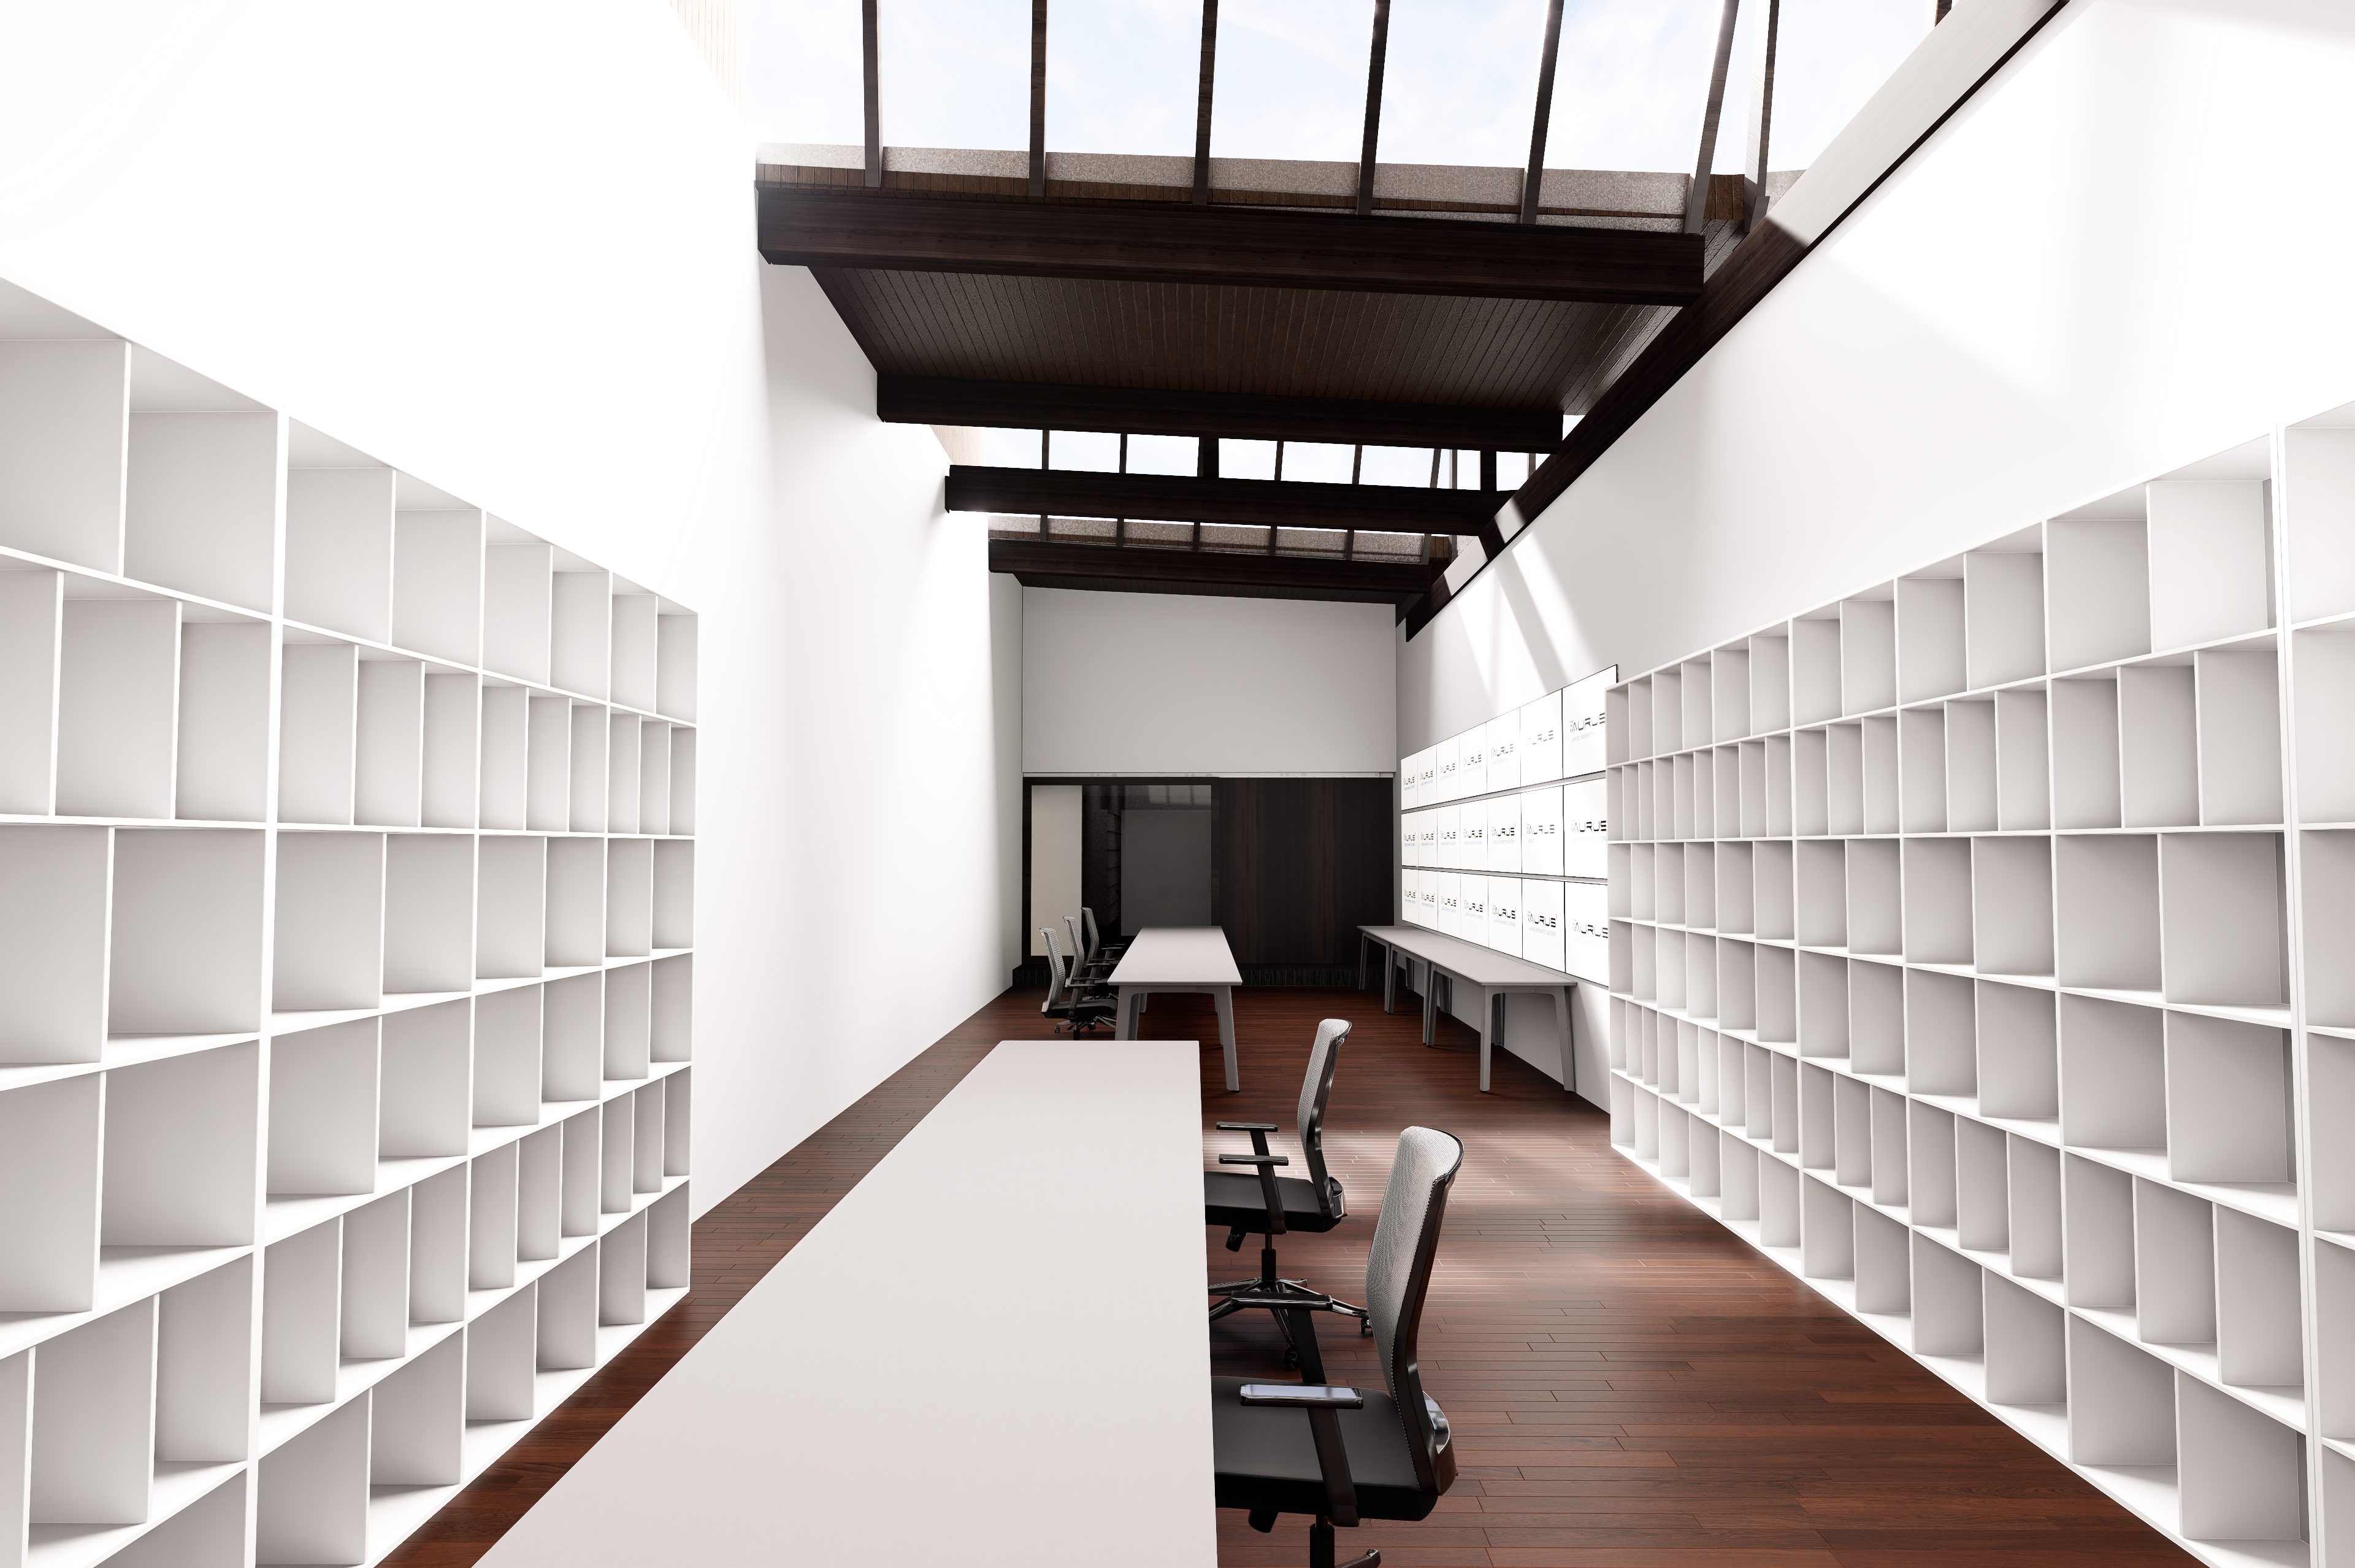
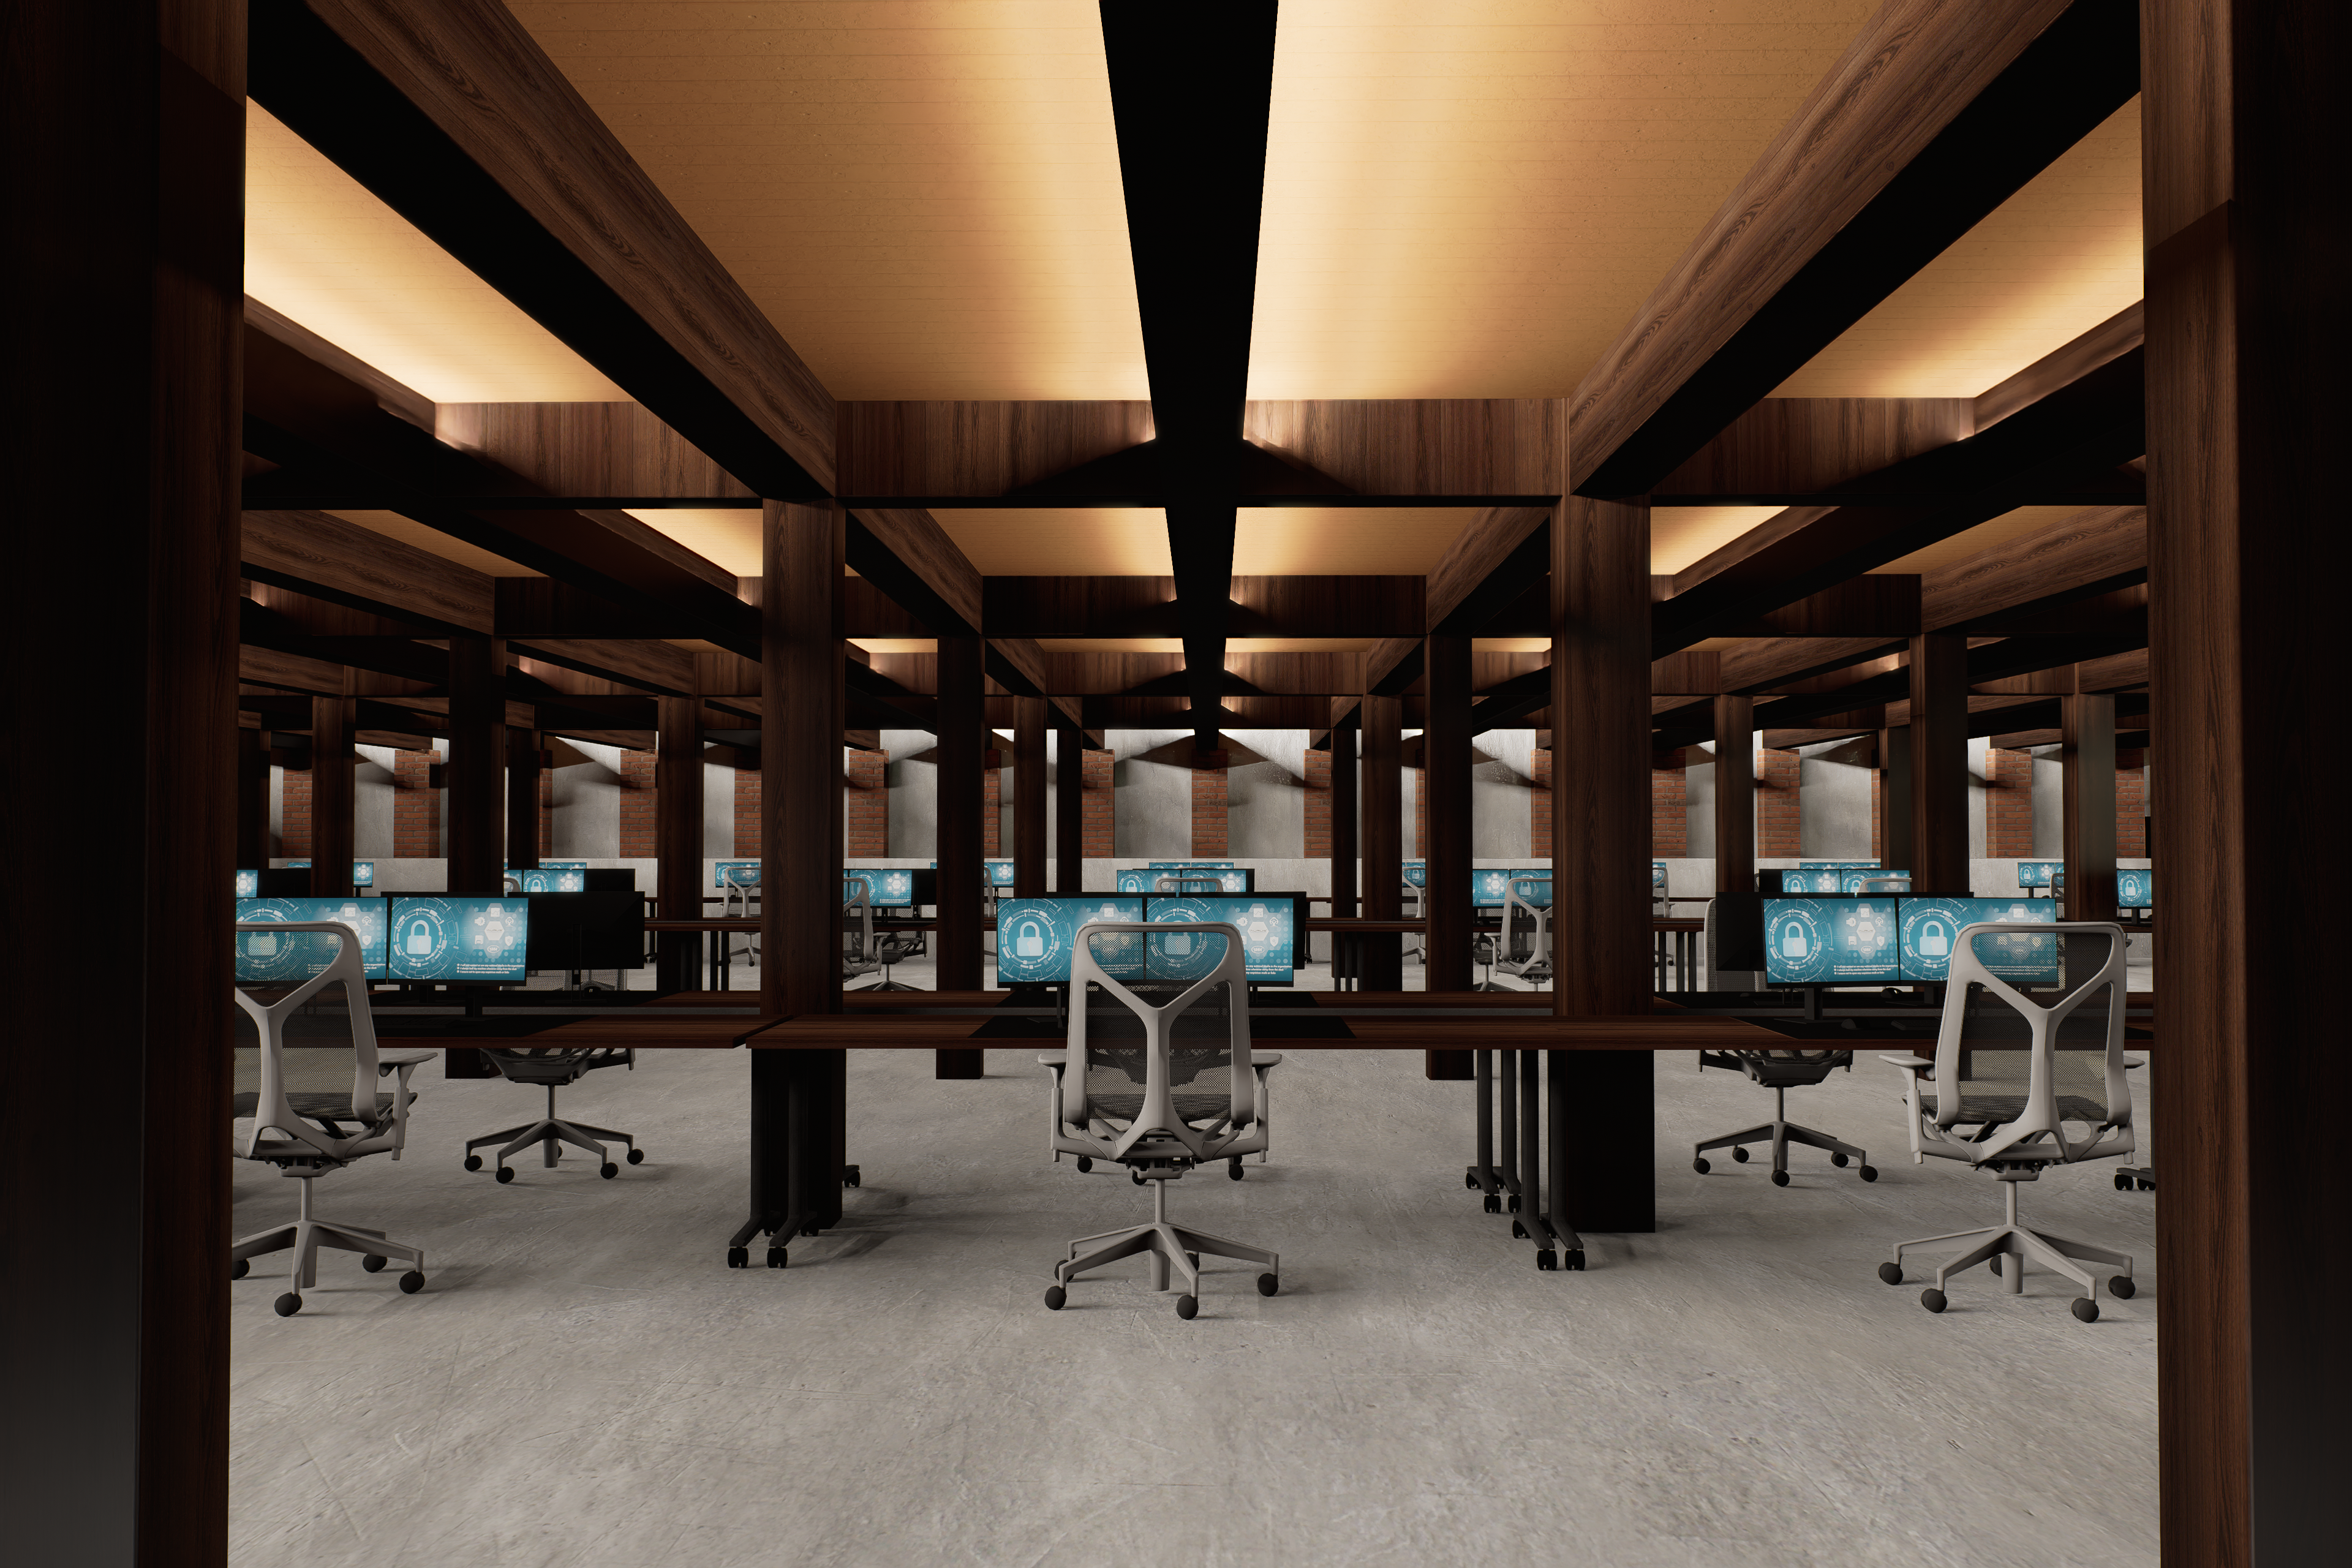
New Proposed Layout of Headquarters
Zoning
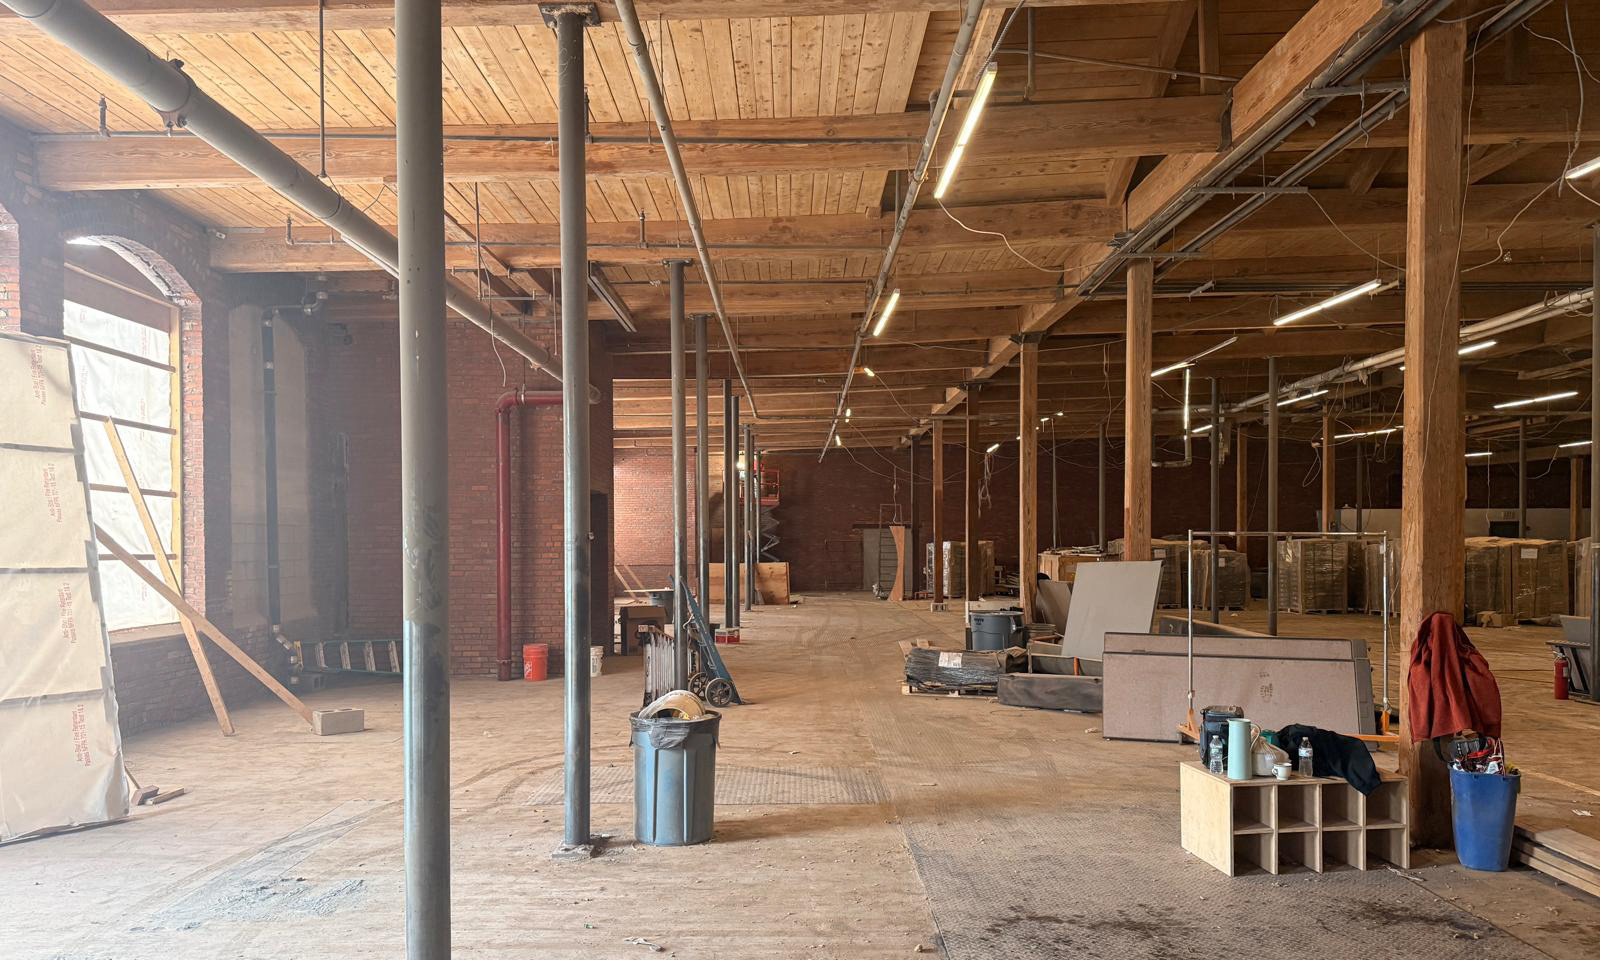
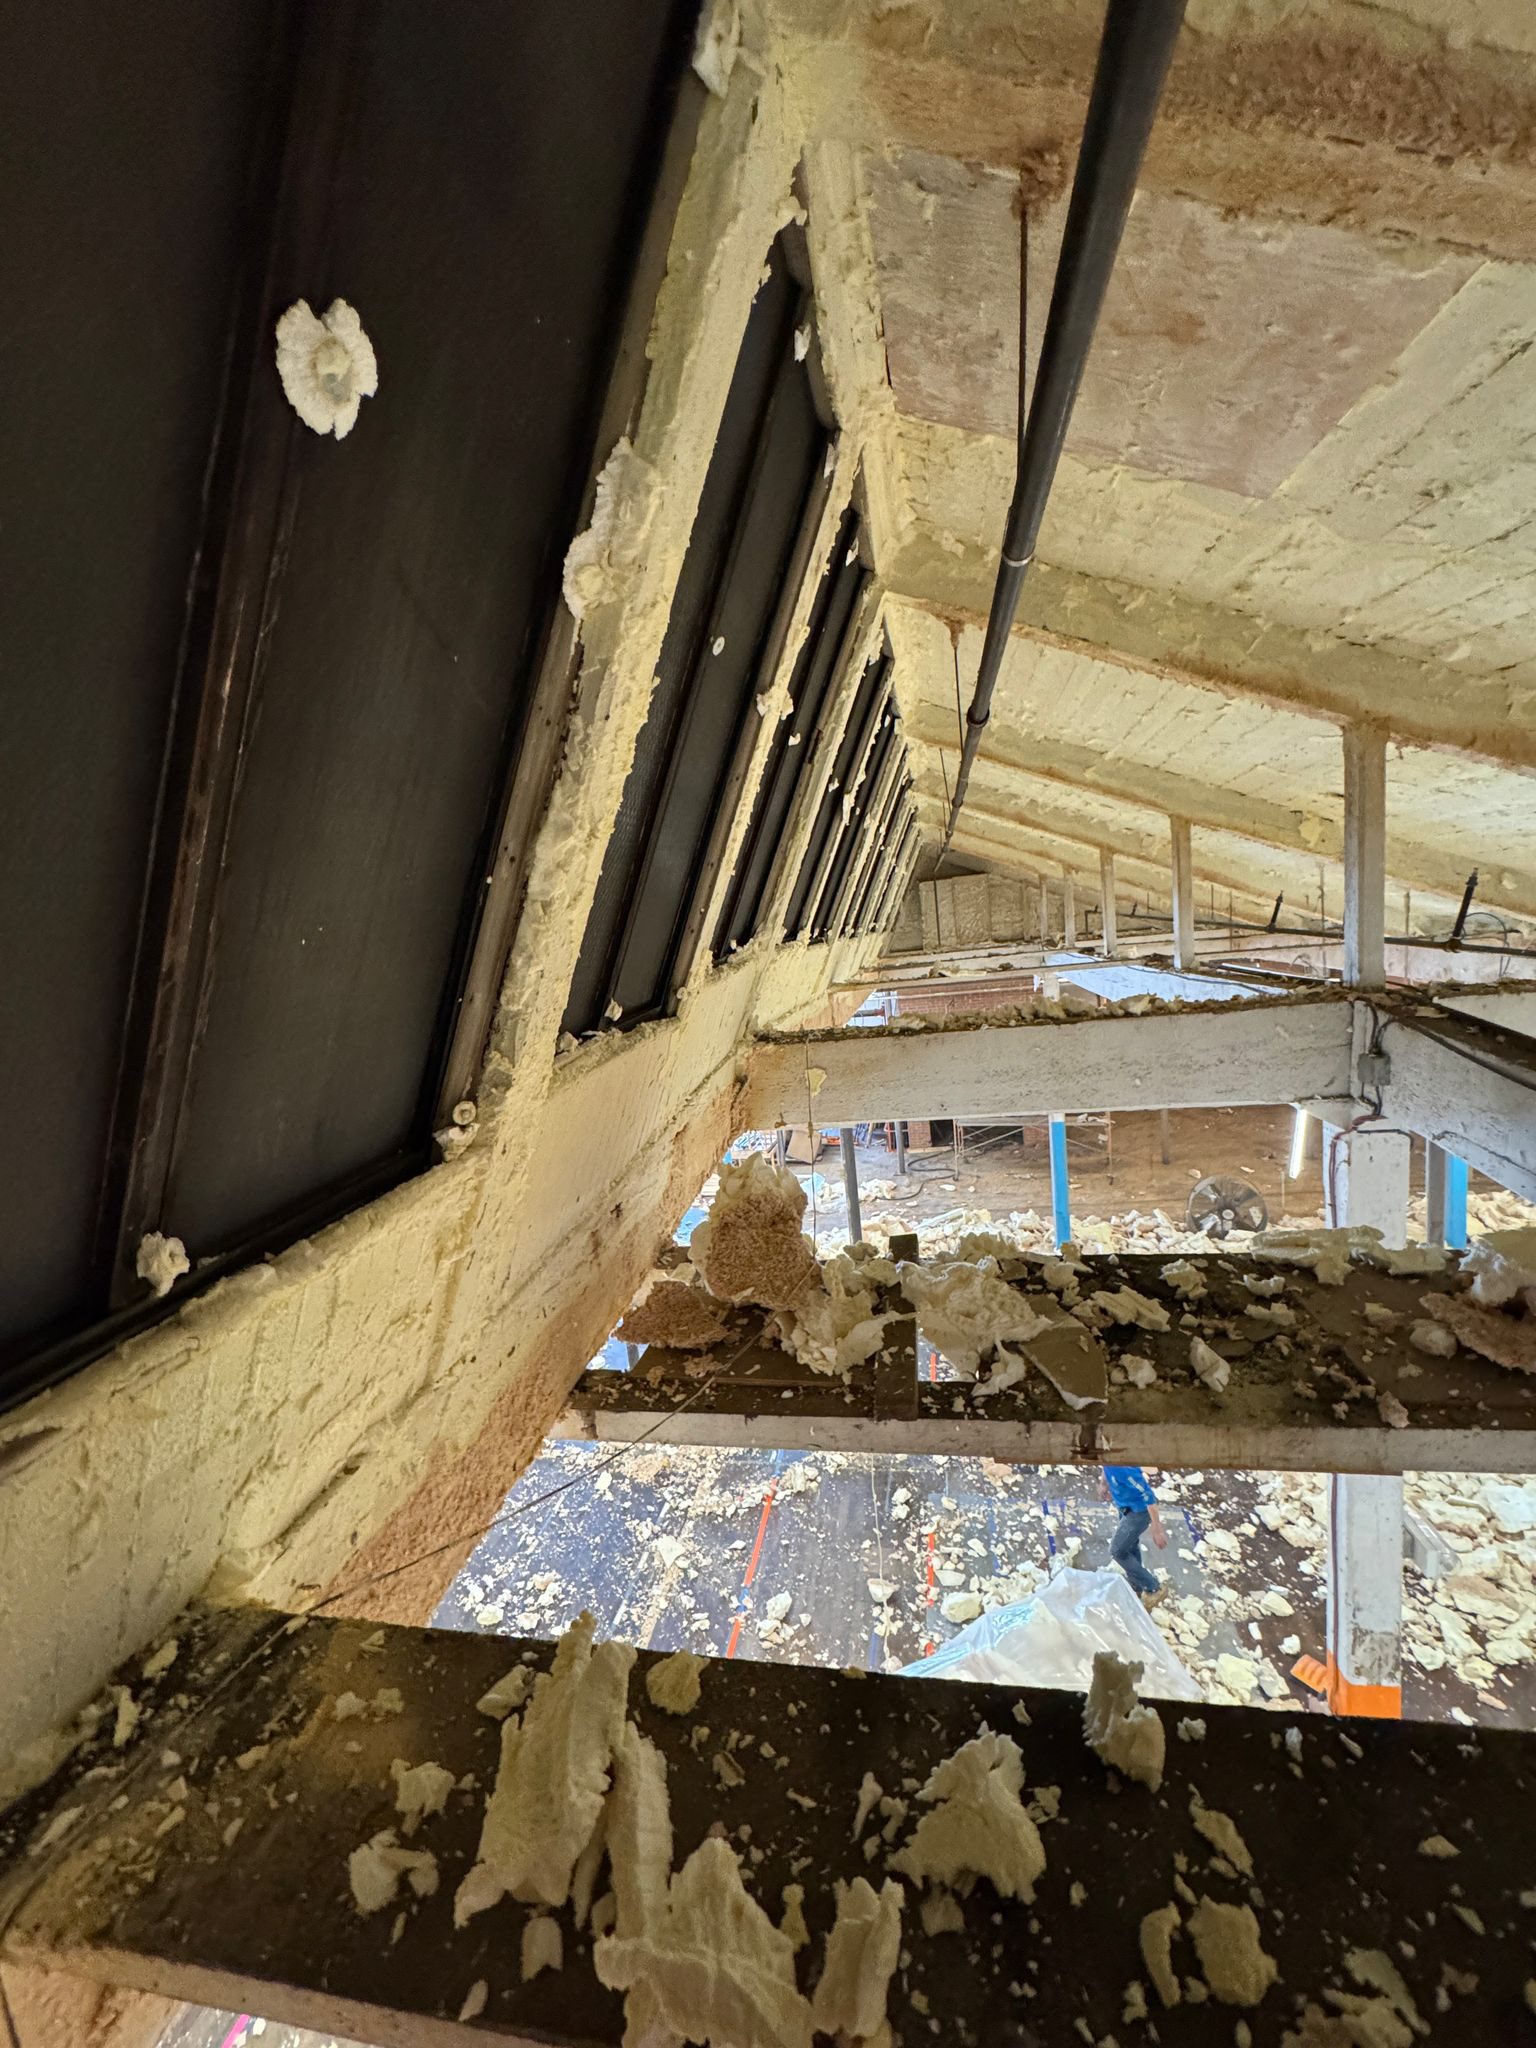
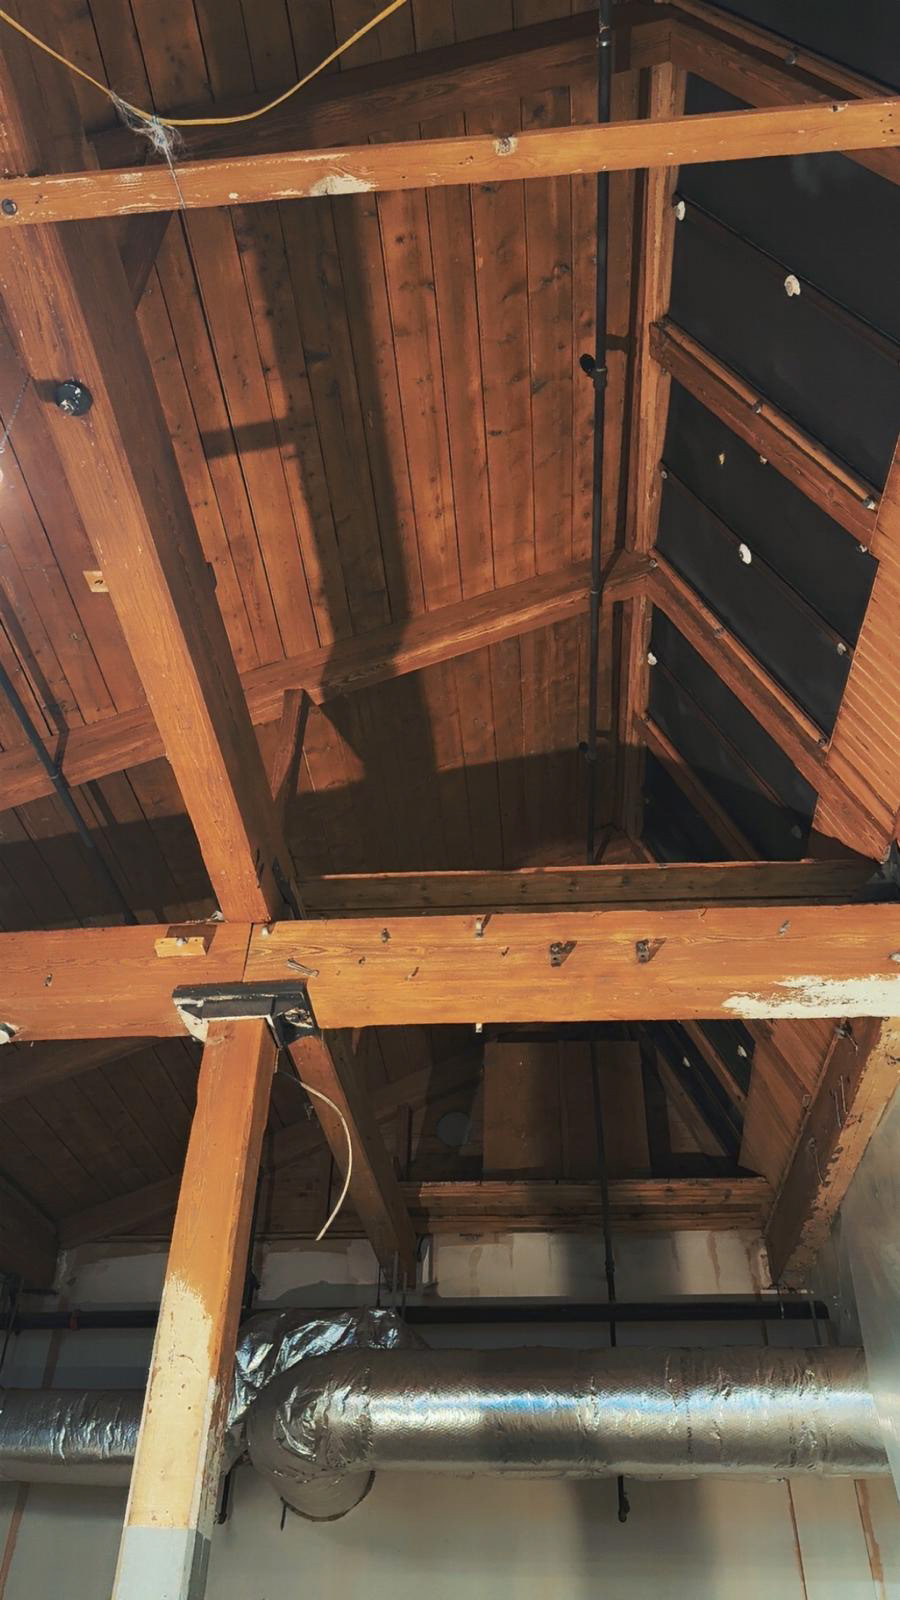
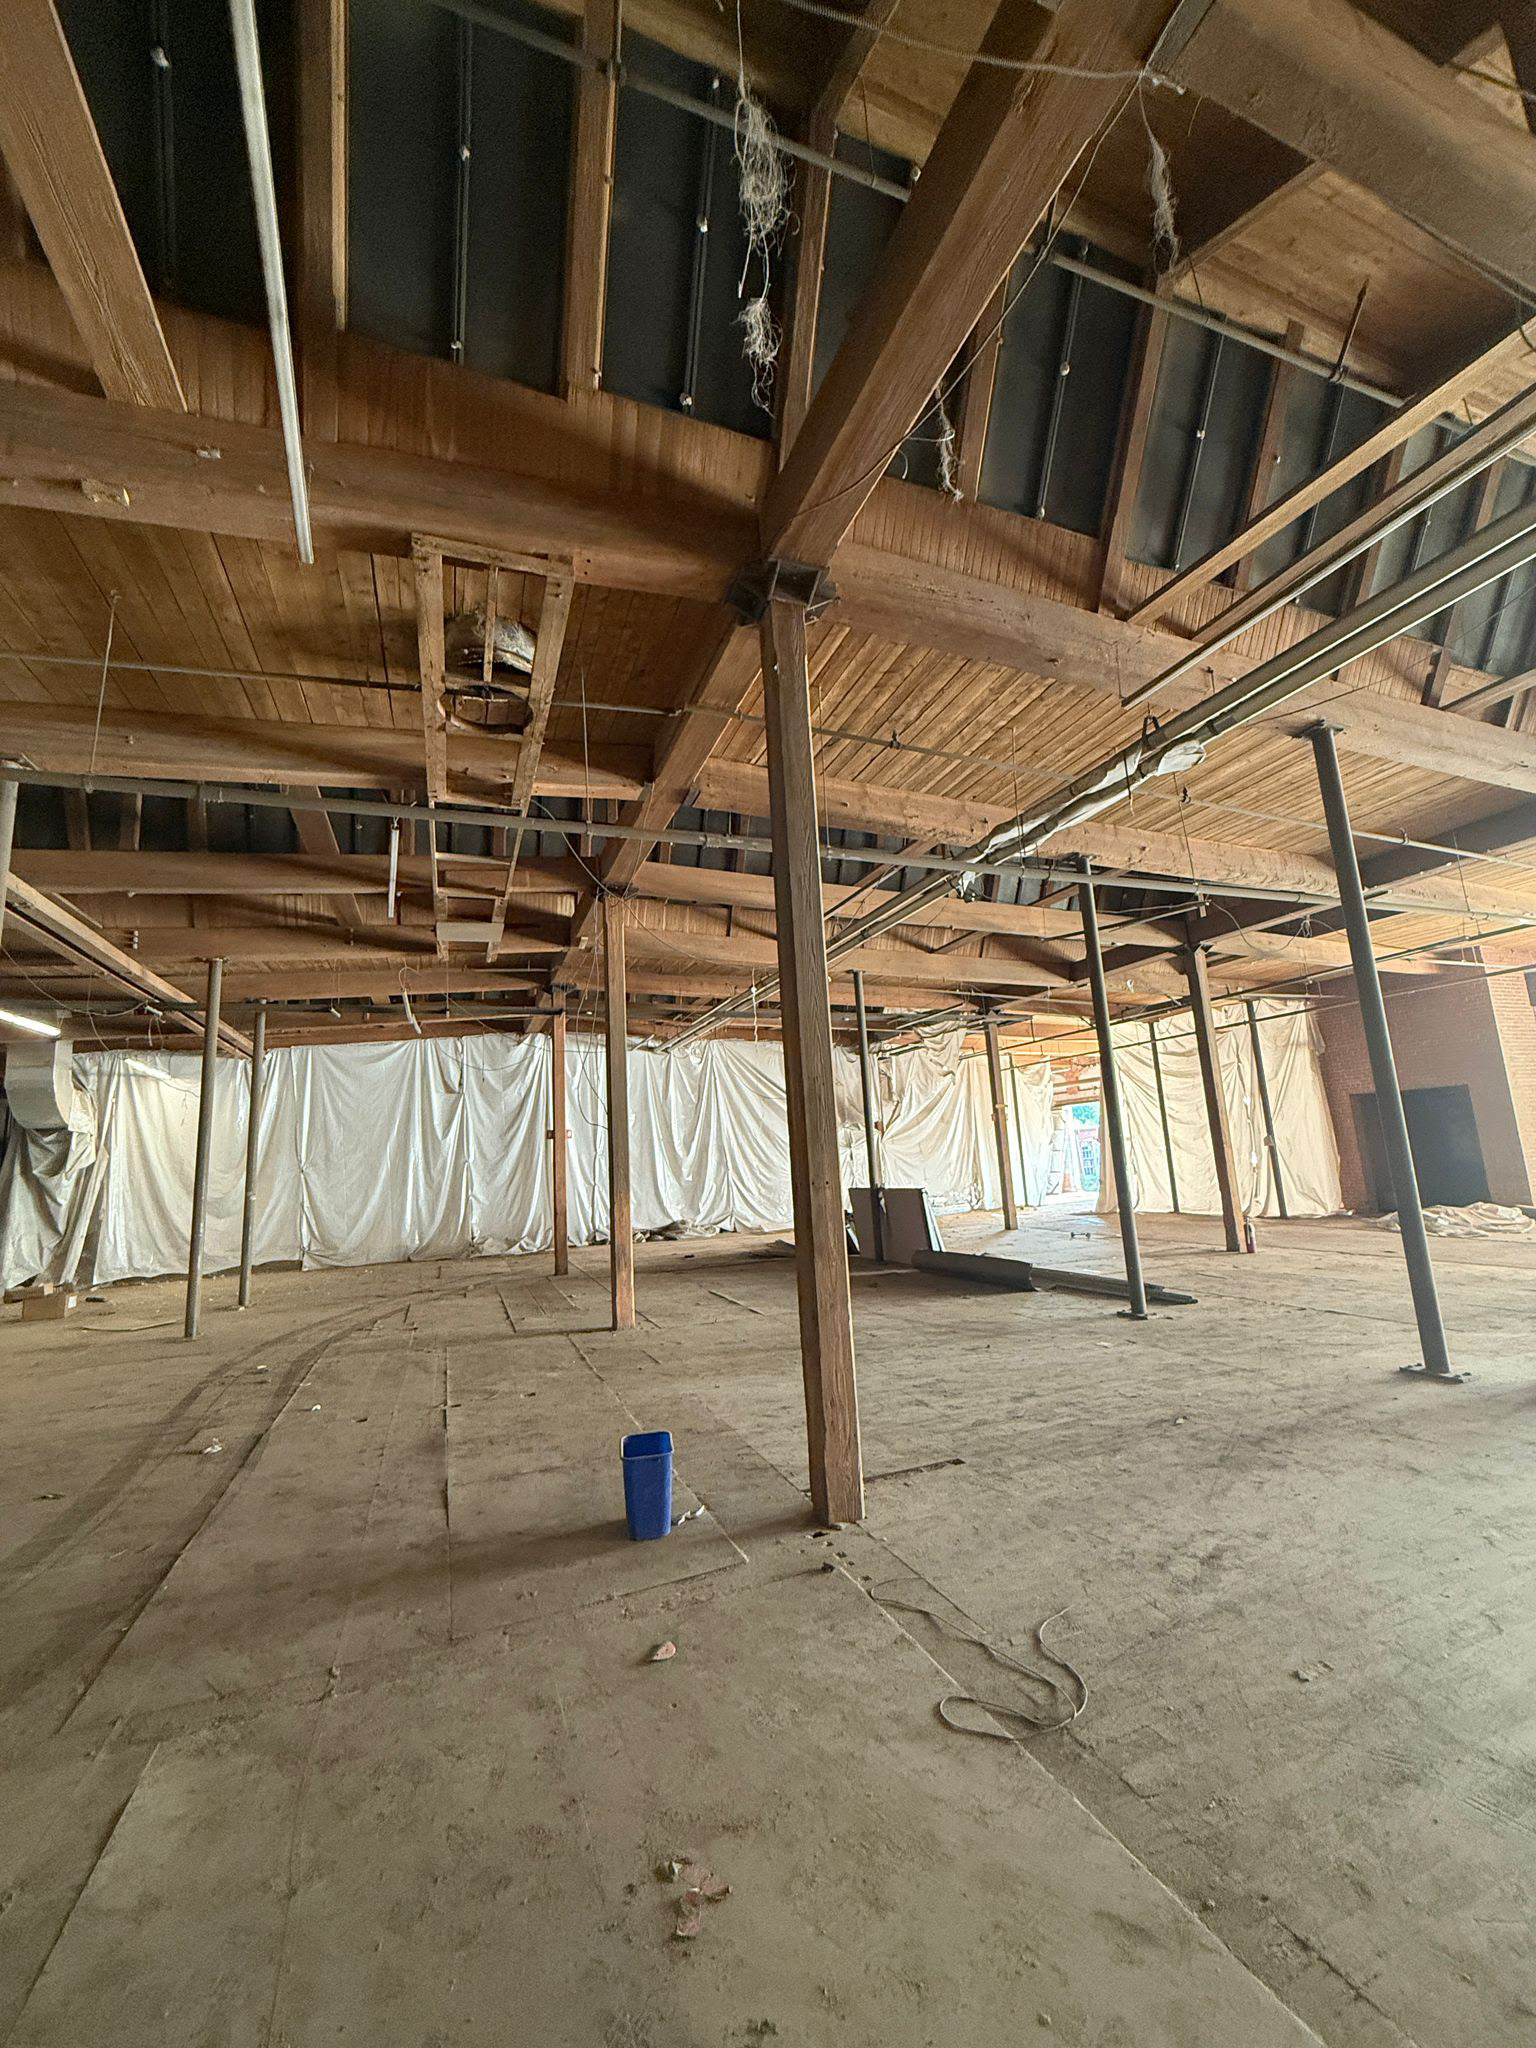
Existing Warehouse Condition
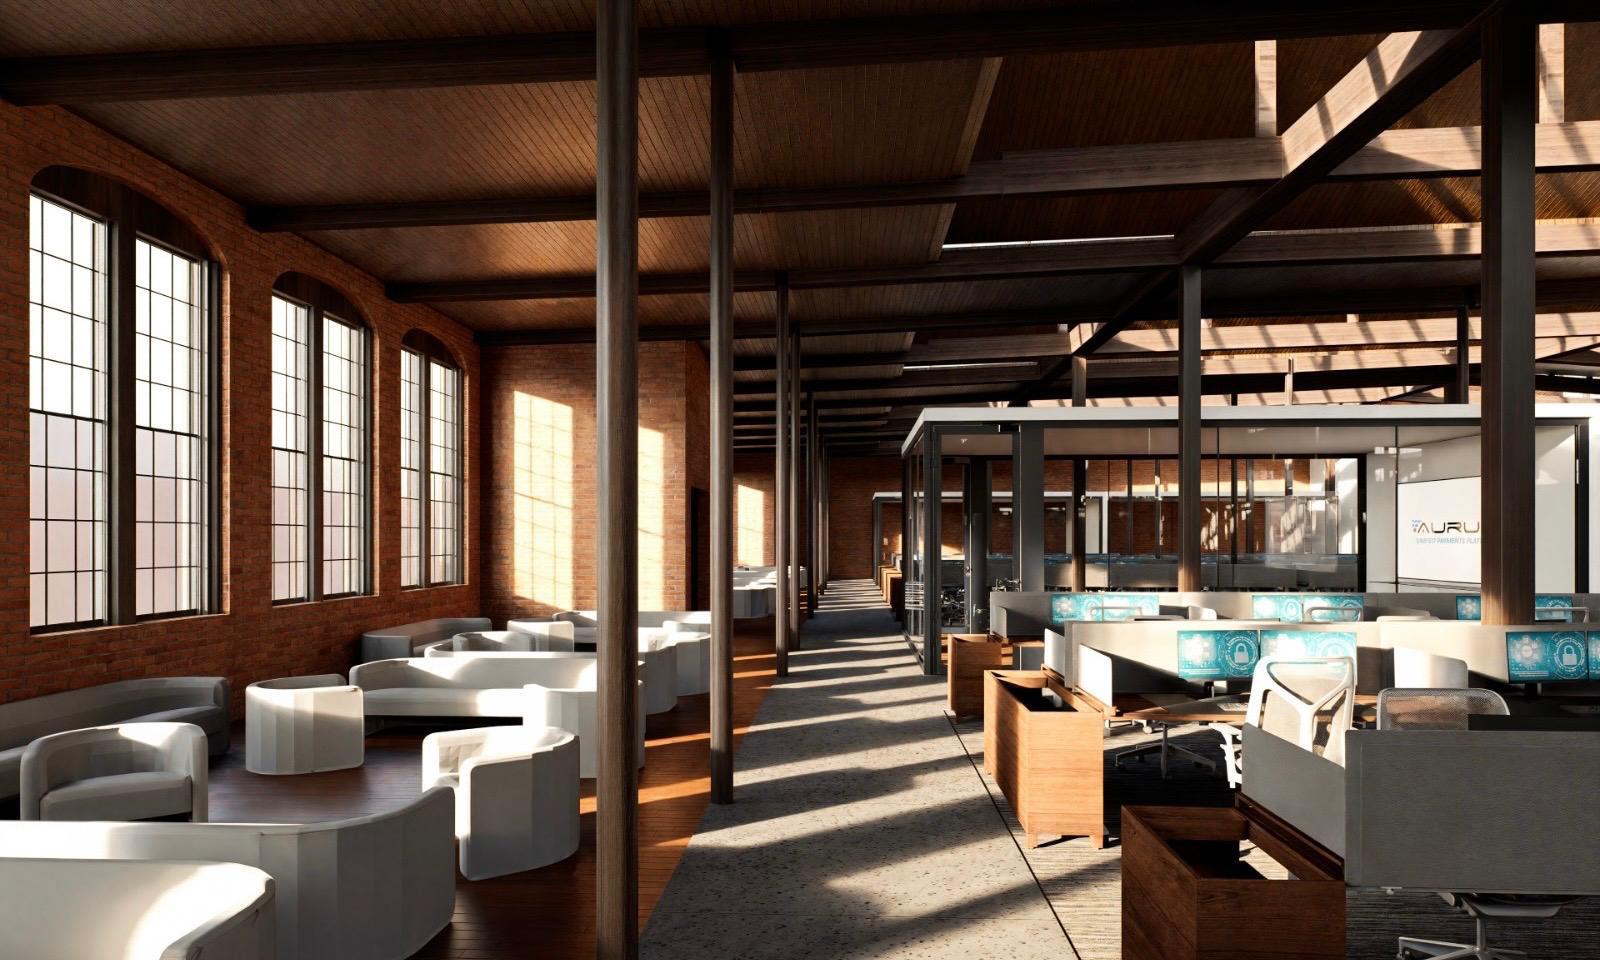
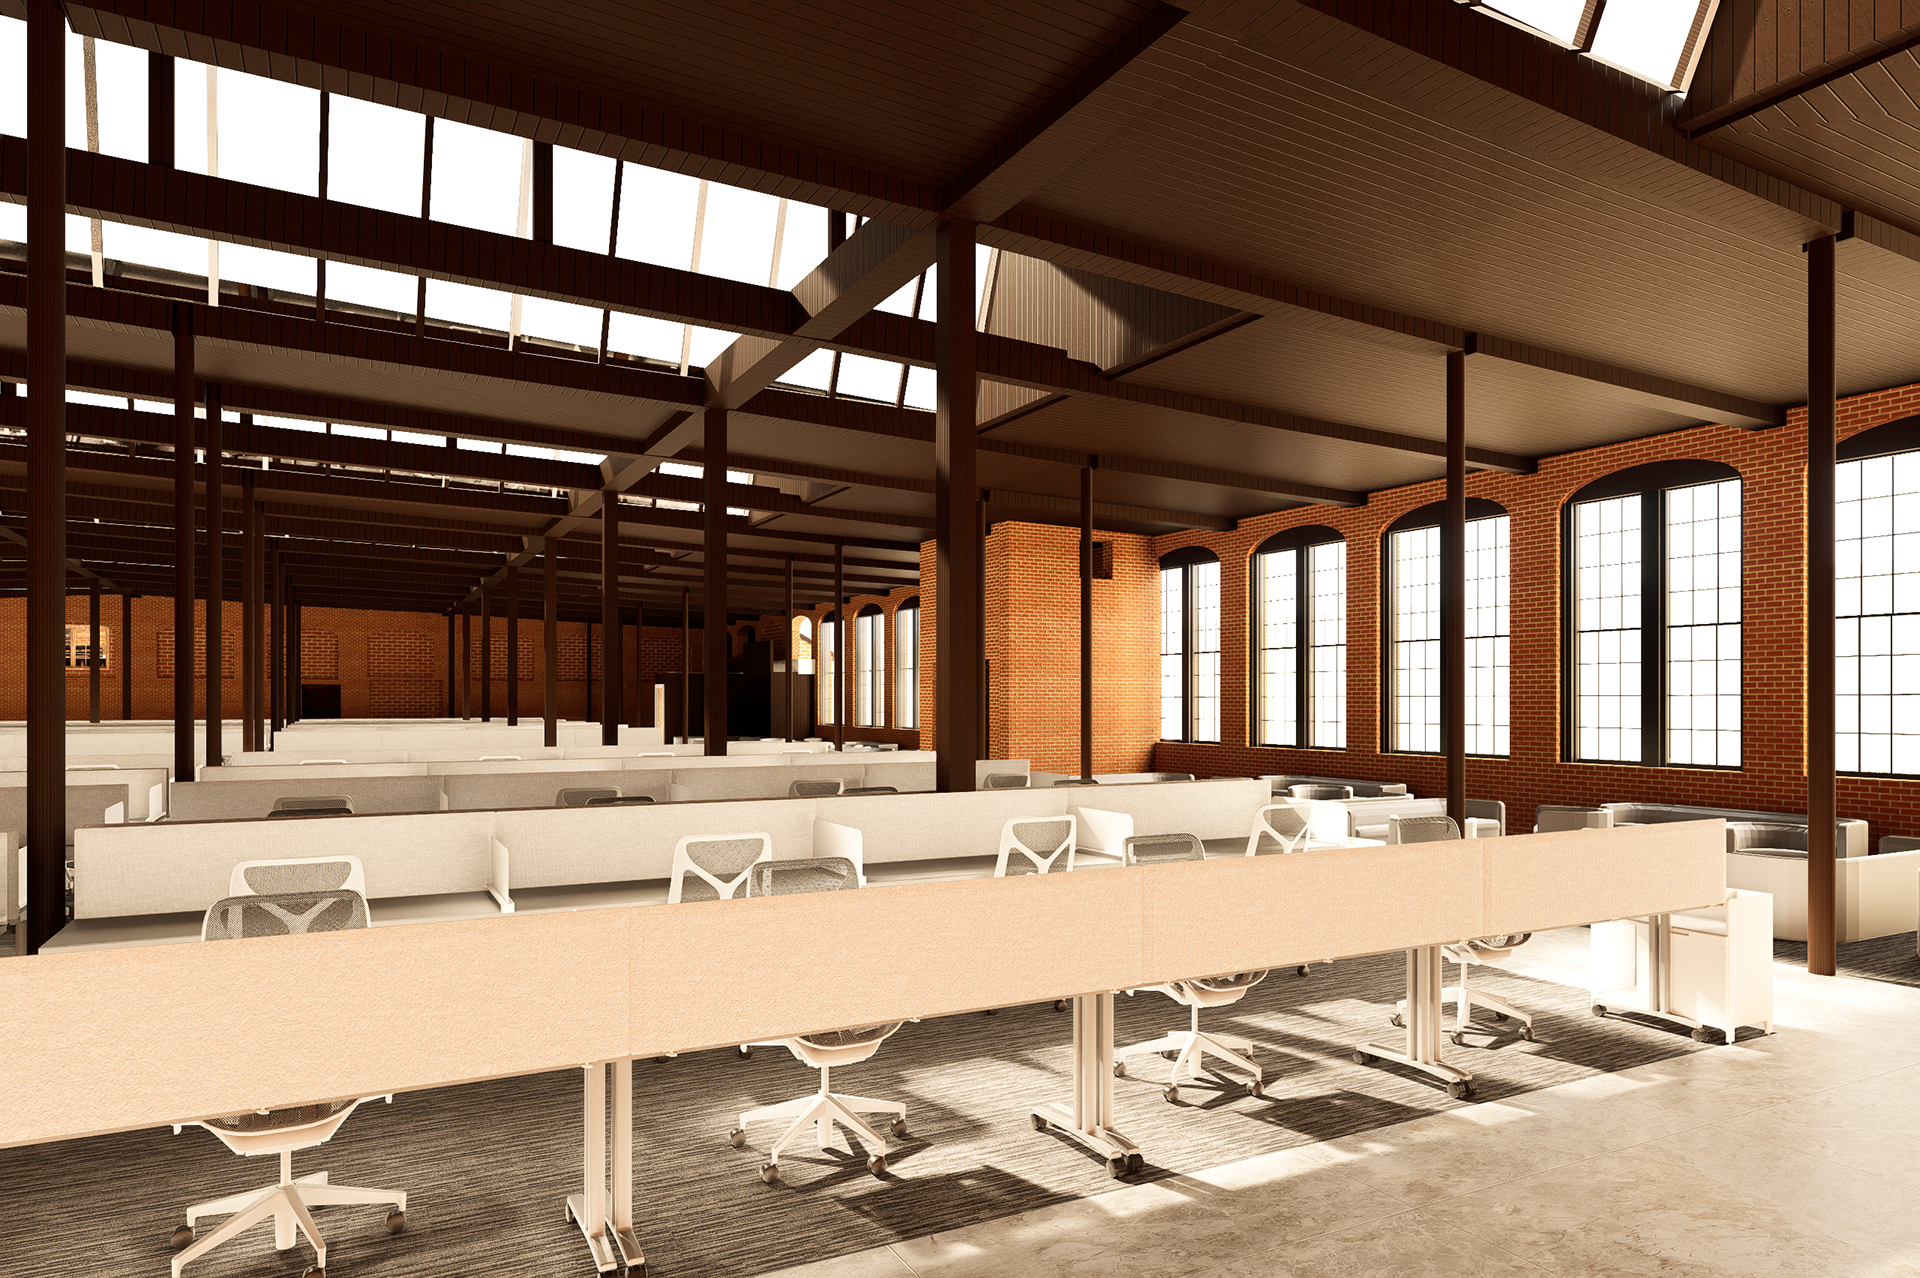
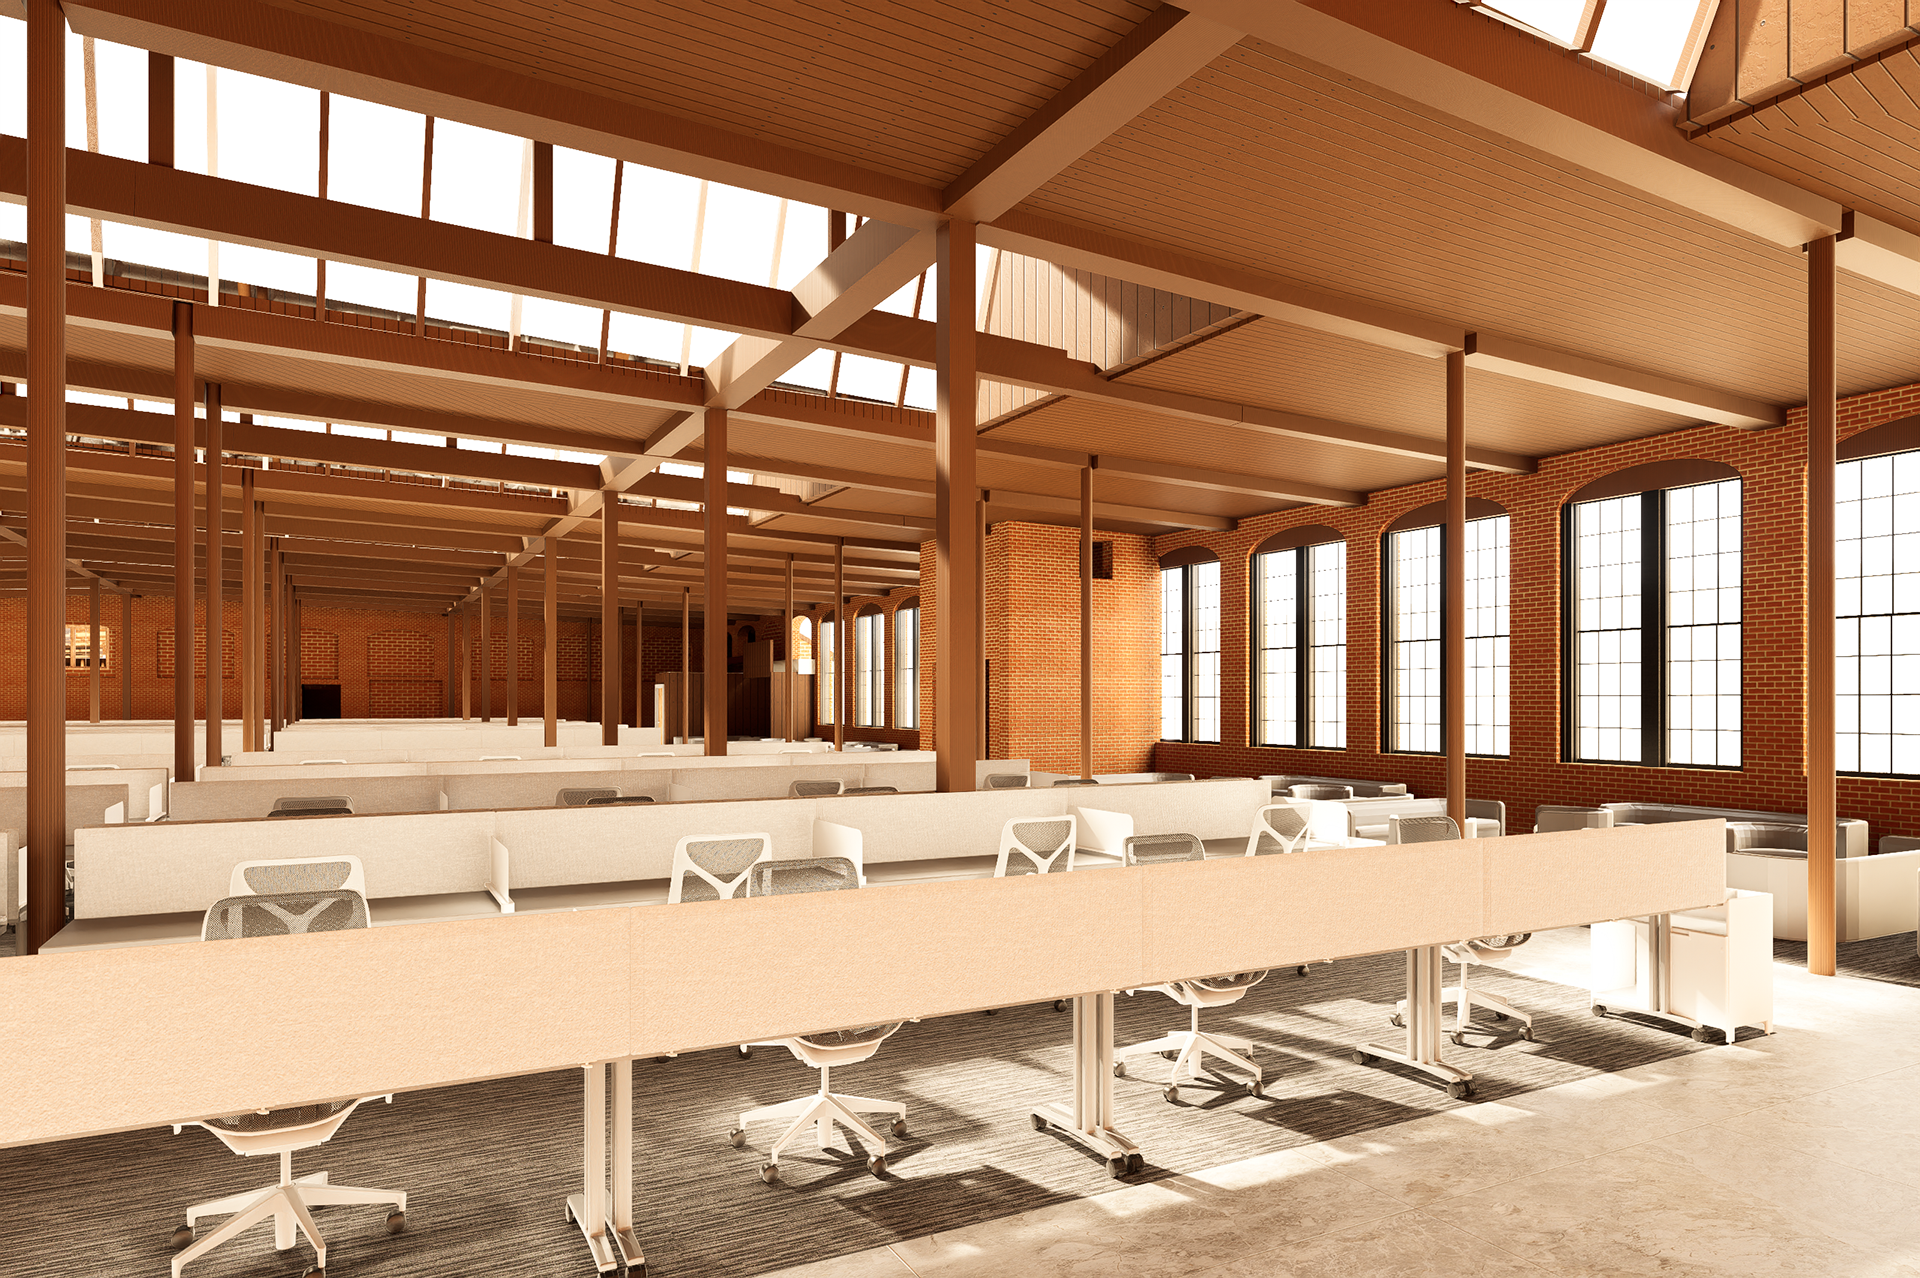
Proposed Design Layout
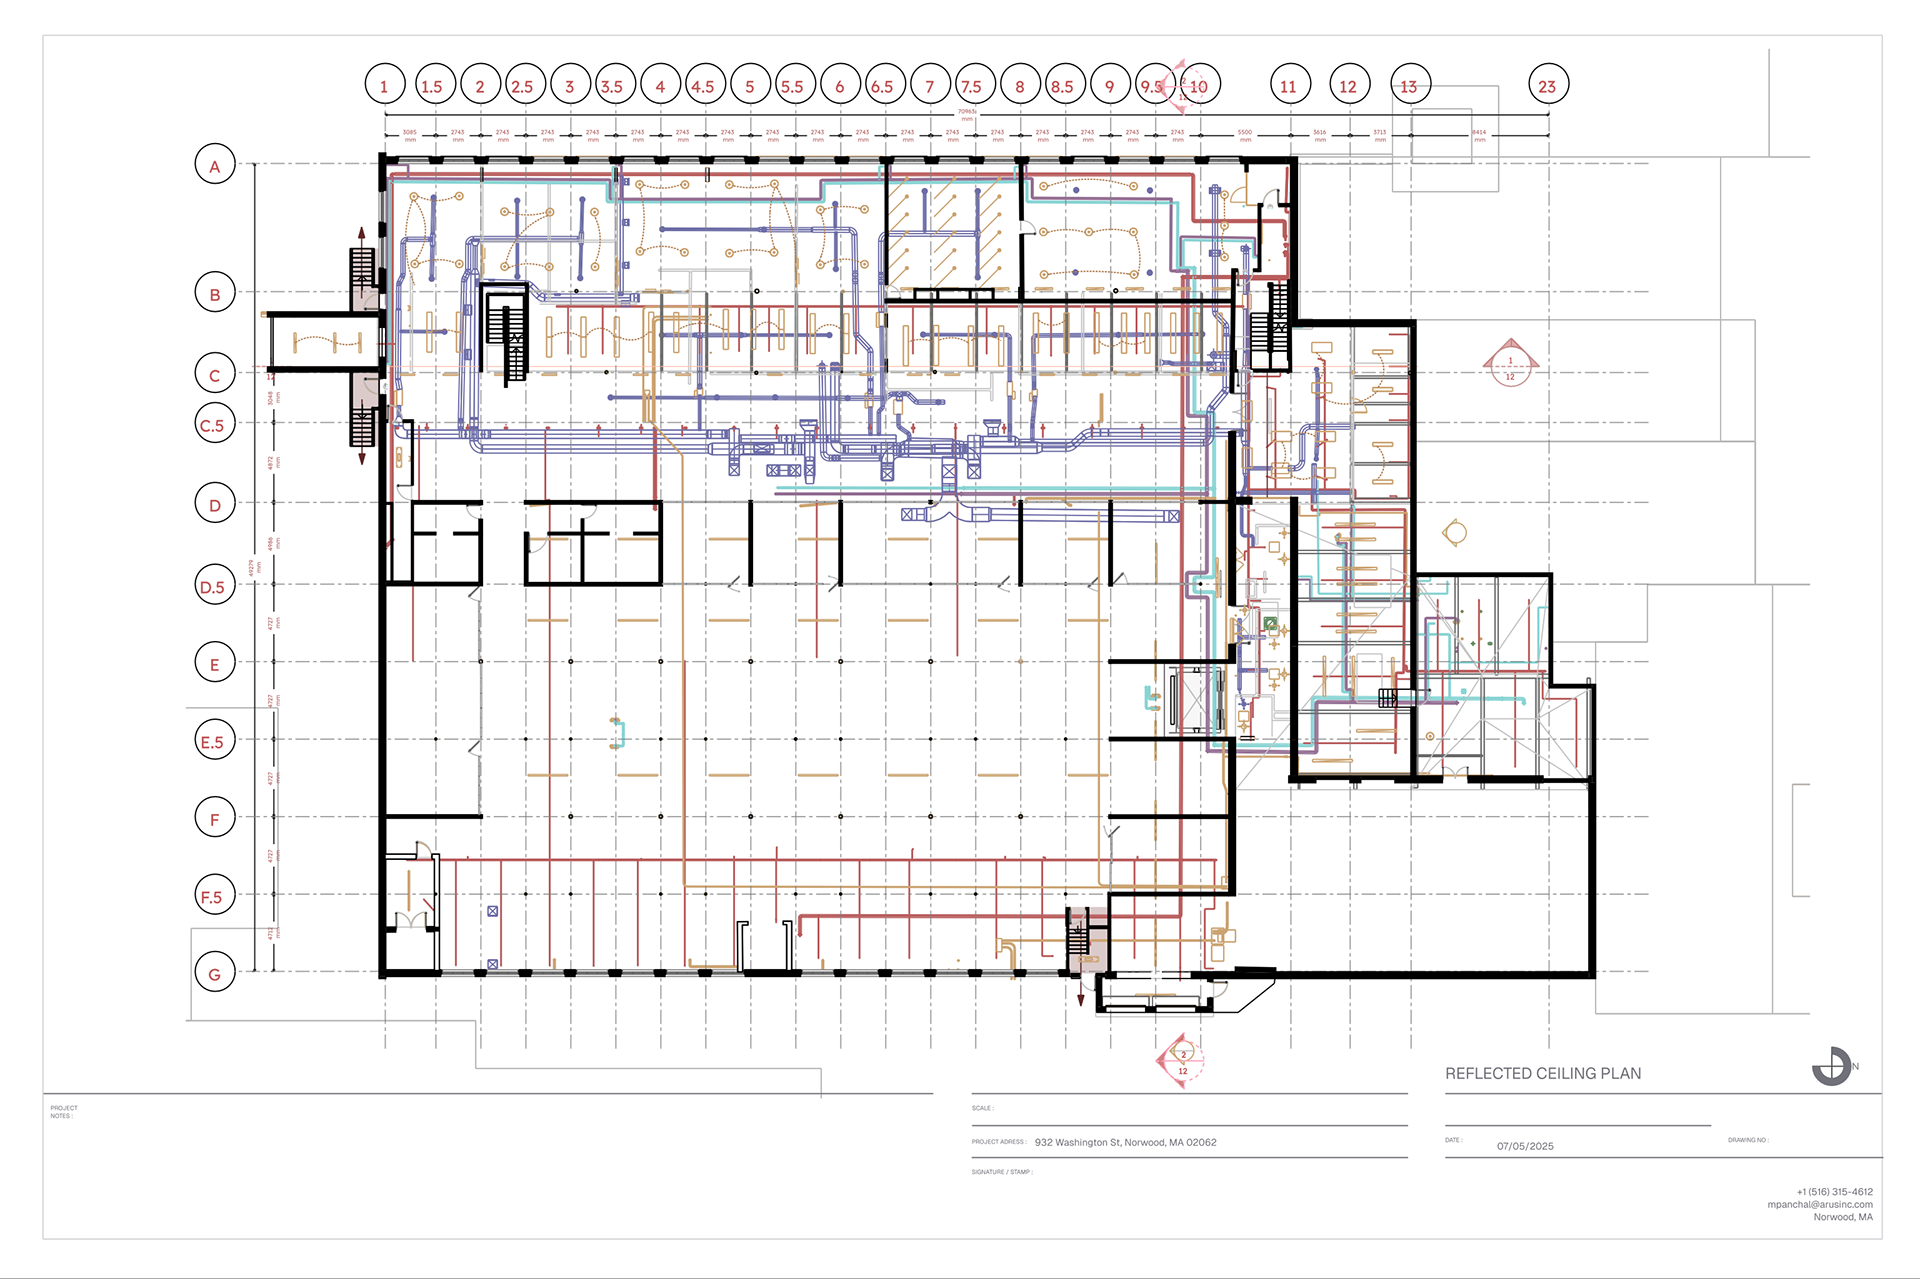
HVAC and Lighting Fixtures Plan
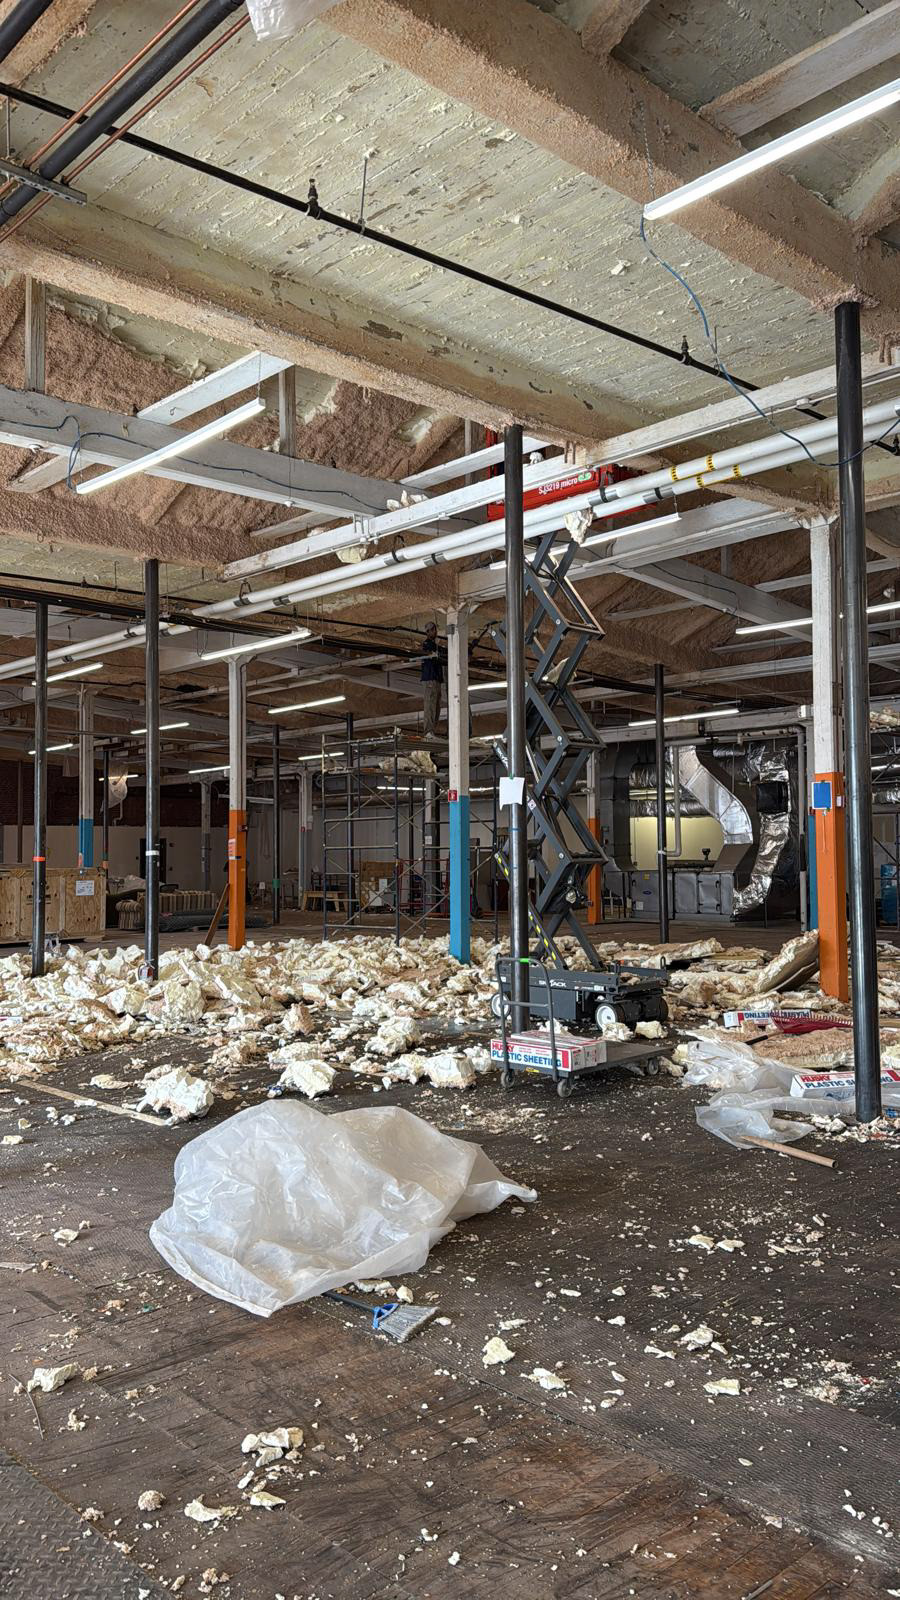
Working space

Windows Opening up
Before Sandblasting
After Sandblasting
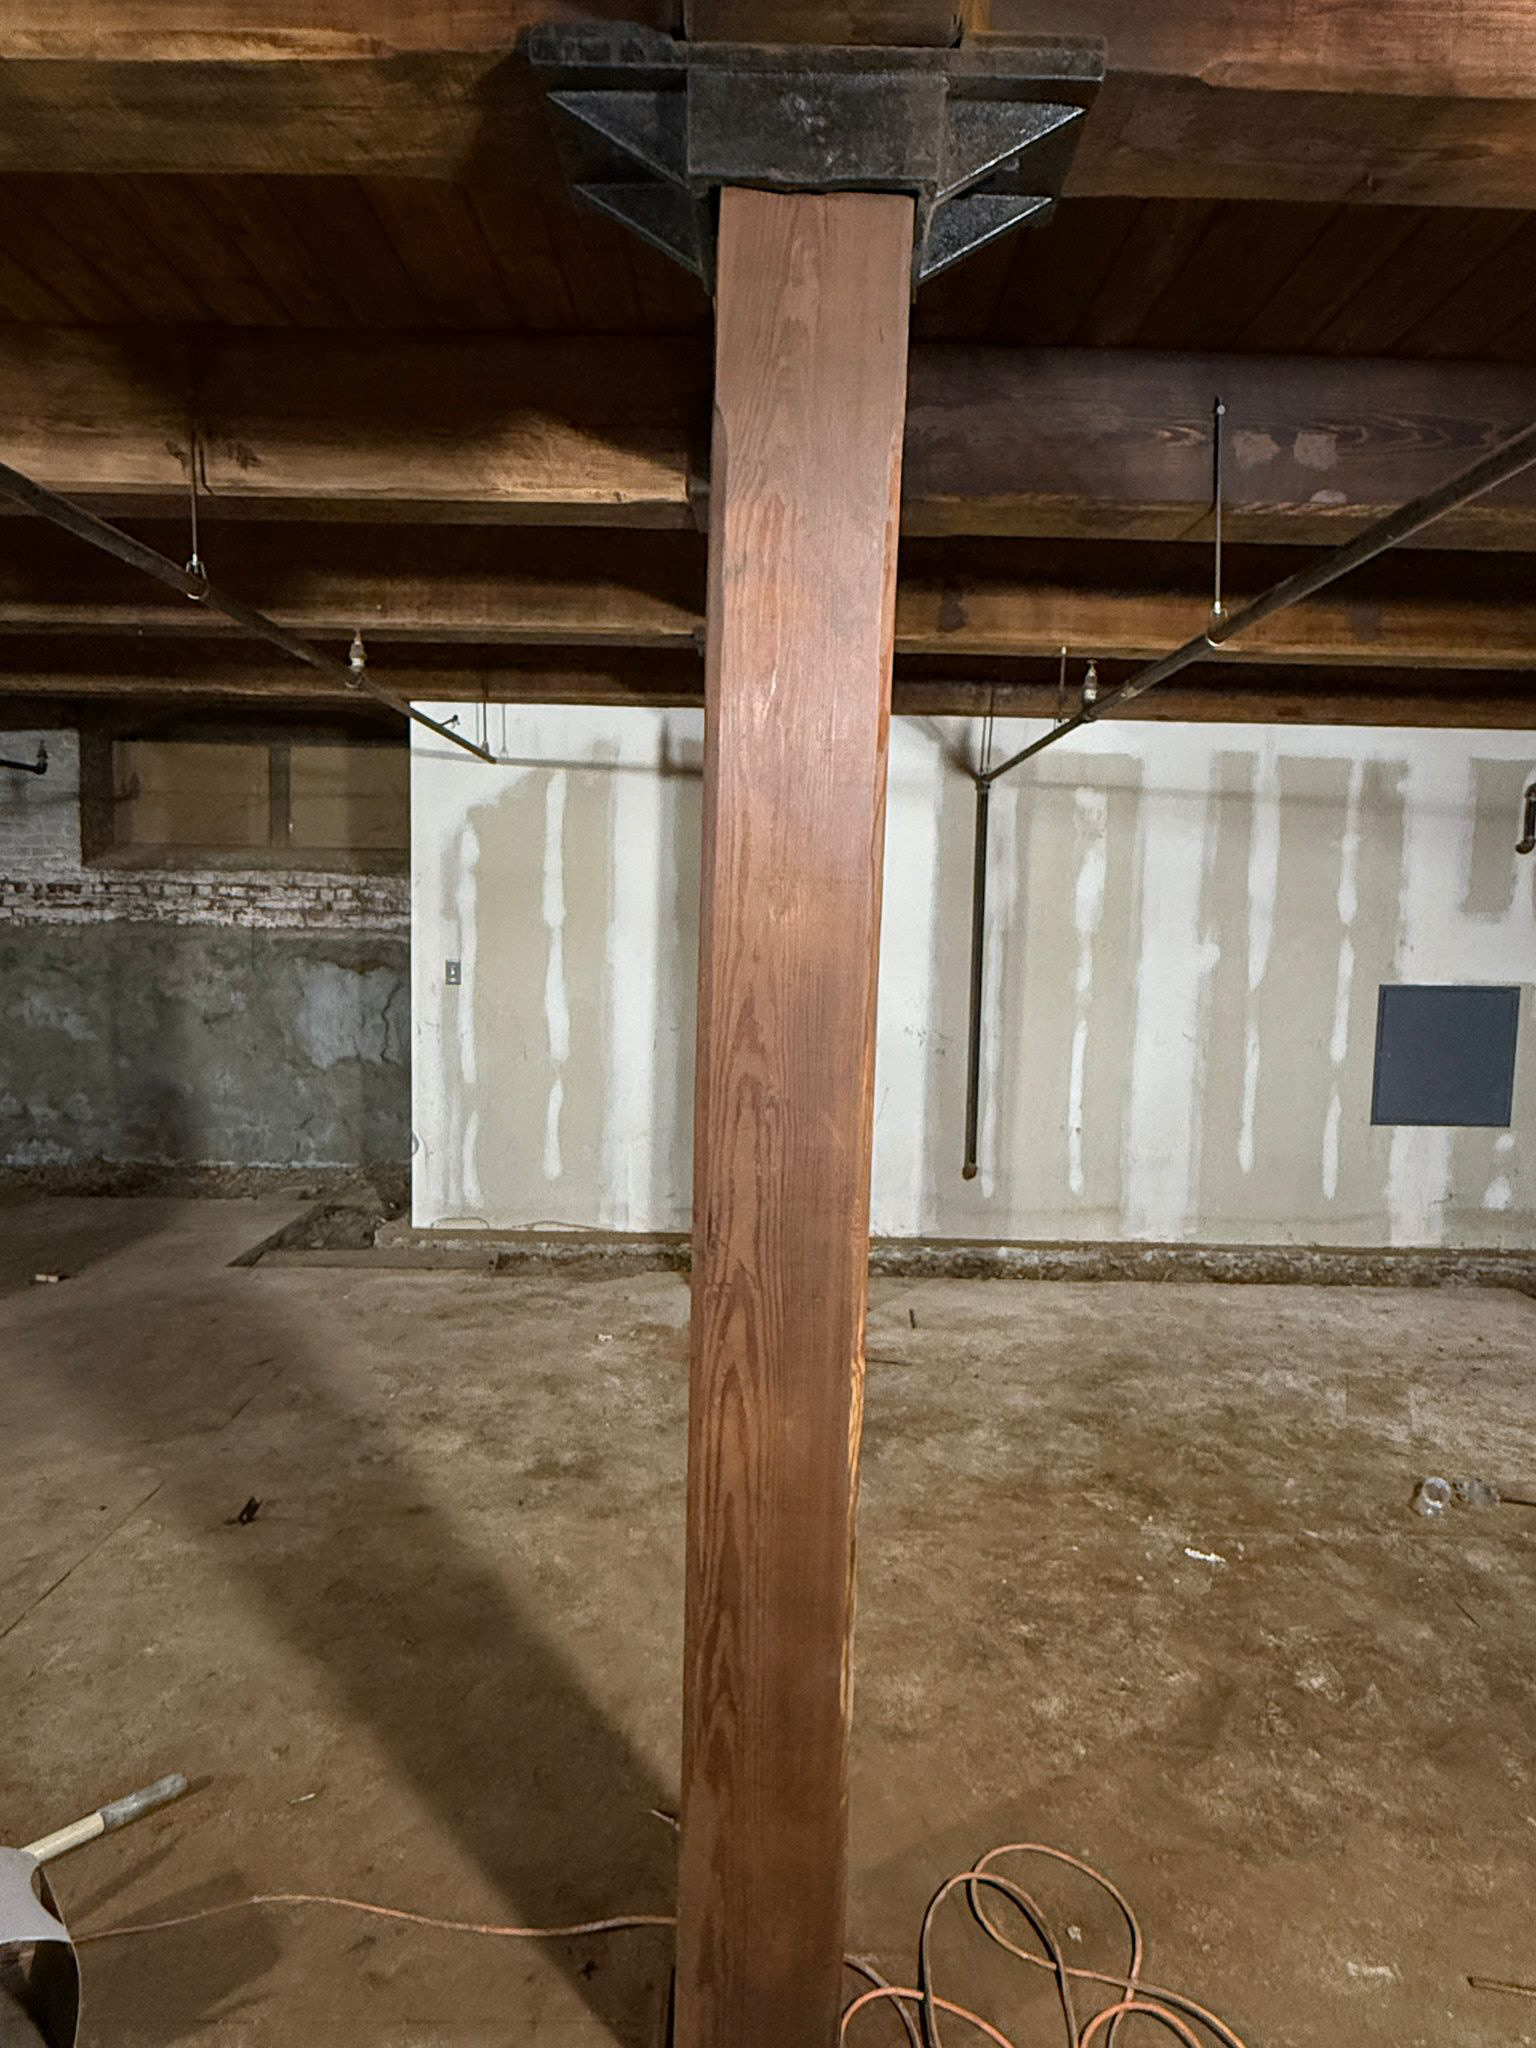
Existing Condition of Basement
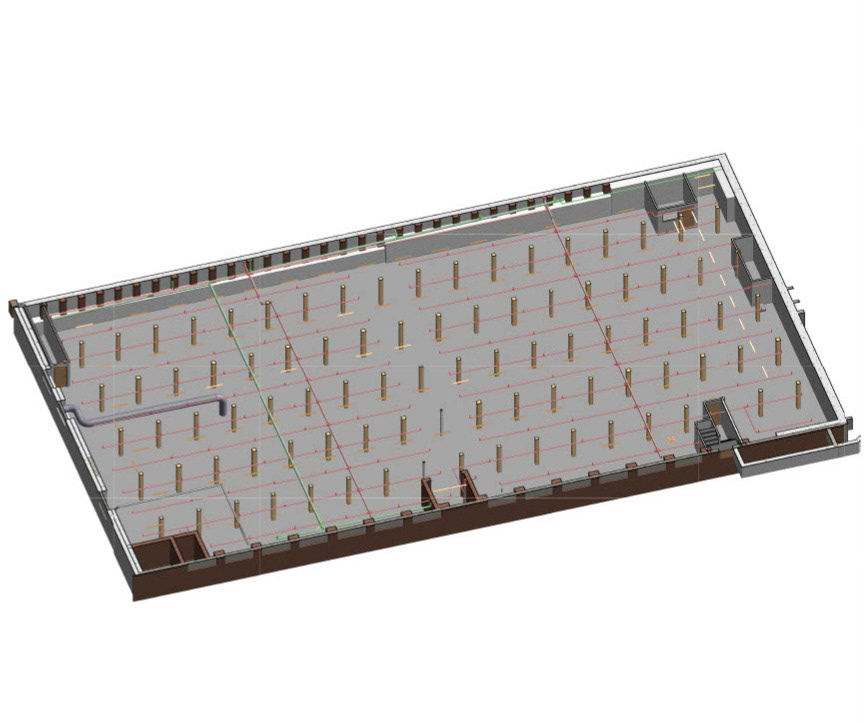
Basement Revit Model
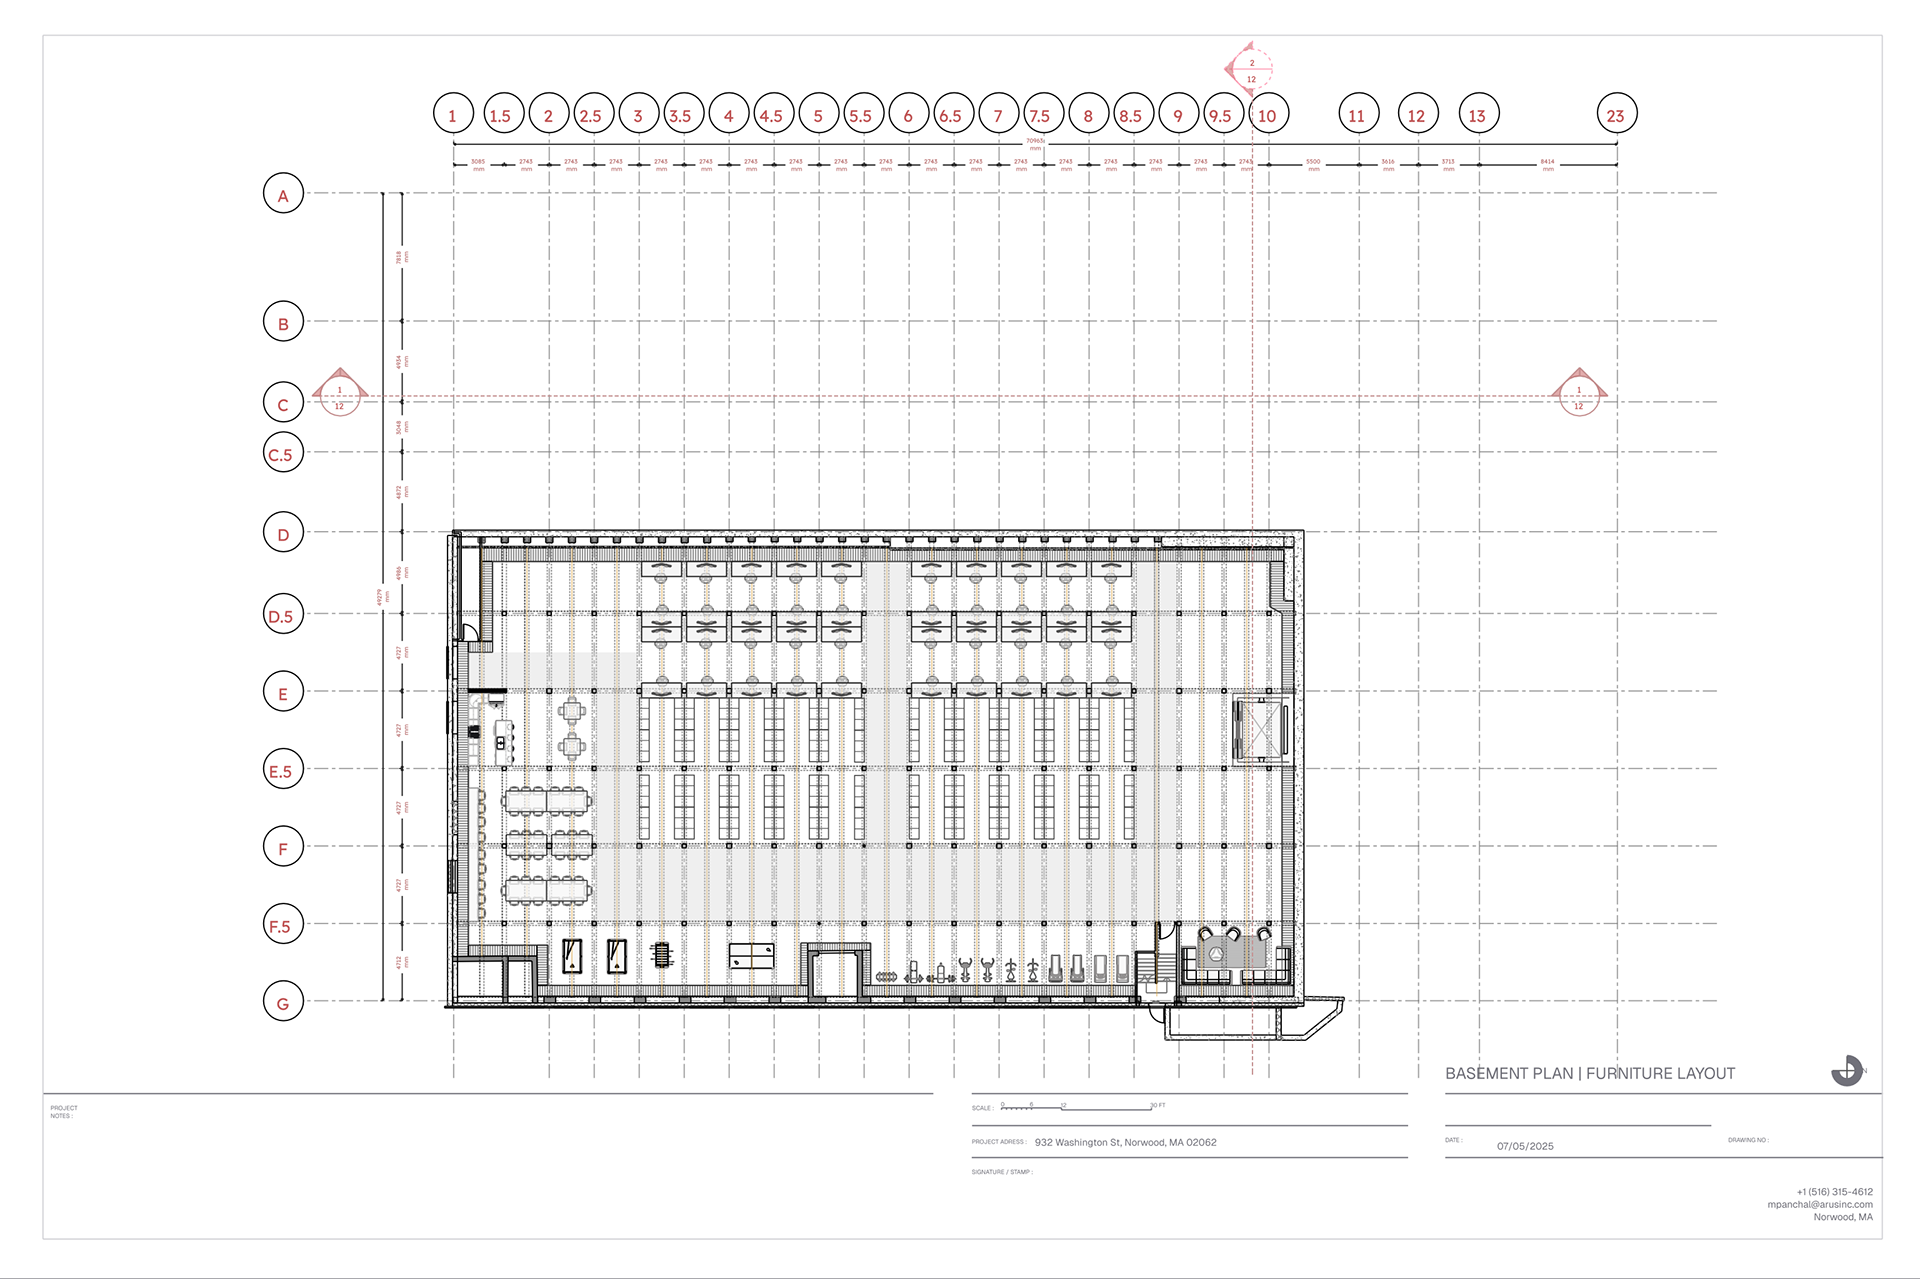
New Proposed Layout of Headquarters
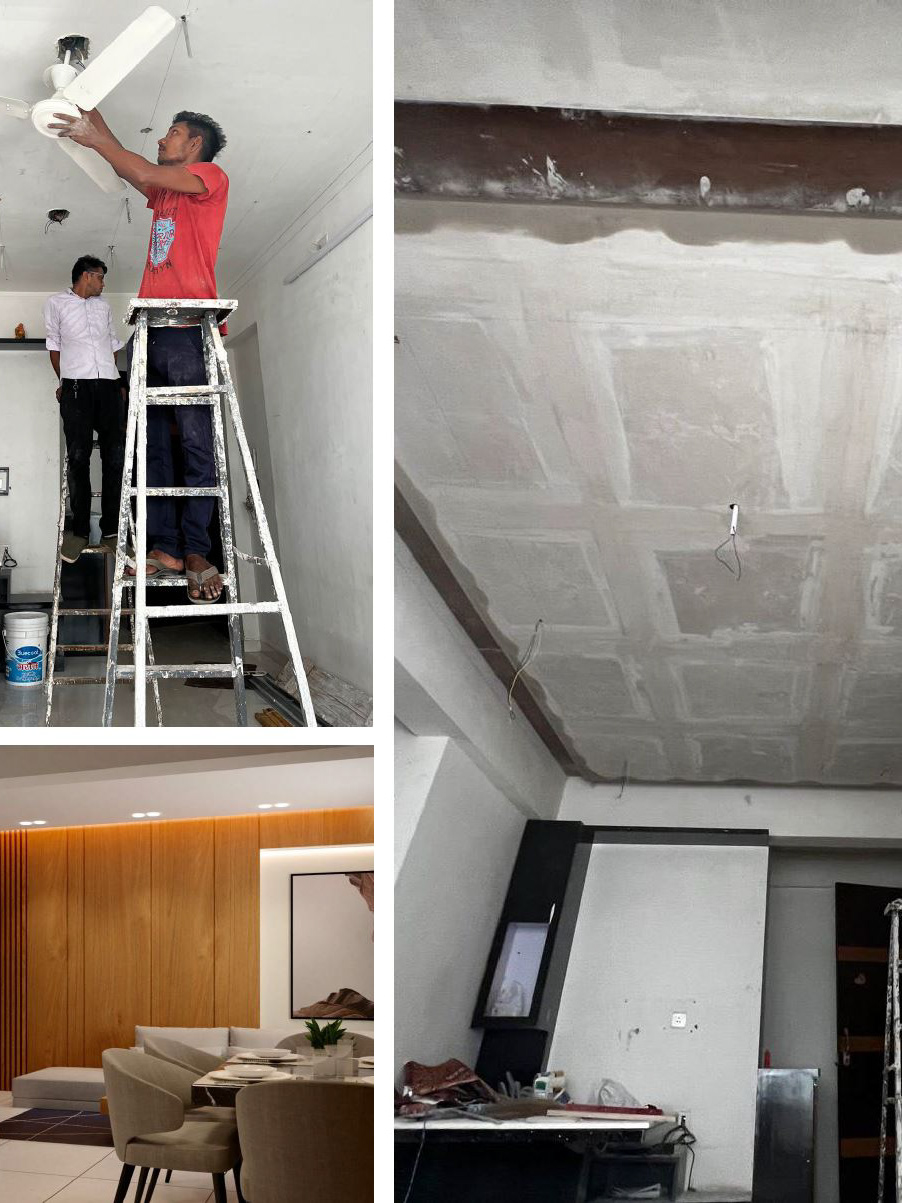
Scope of Work – Wood Surface Finishing
Surface Preparation
Remove all nails, screws, and any obstructions from all beams, columns, and ceiling surfaces.
Remove all nails, screws, and any obstructions from all beams, columns, and ceiling surfaces.
Wood Filler Application
Apply wood filler to all holes and surface imperfections, matching the wood grain. Avoid unnecessary wastage.
Apply wood filler to all holes and surface imperfections, matching the wood grain. Avoid unnecessary wastage.
Sanding – Initial Phase
Sand the surface thoroughly using 60 and 150 grit sandpaper to achieve a smooth and even texture.
Sand the surface thoroughly using 60 and 150 grit sandpaper to achieve a smooth and even texture.
First Coat – Wax Application
Apply the first coat of wood wax evenly, then wipe the surface clean with a cloth to allow the wax to absorb.
Apply the first coat of wood wax evenly, then wipe the surface clean with a cloth to allow the wax to absorb.
Final Coat – Finish Stage
At the final stage of the project, sand the surface again with 220 grit sandpaper. Then apply the second coat of wood wax, wipe off the excess, and follow with a clear satin finish coat for added protection and long-term durability.
At the final stage of the project, sand the surface again with 220 grit sandpaper. Then apply the second coat of wood wax, wipe off the excess, and follow with a clear satin finish coat for added protection and long-term durability.
Testing Color Shades for Wooden Ceiling

Filled cracks with wood filler.

Sanding for an even surface
After wood wax finish
after sandblasting

Cove Light Fixture Layout
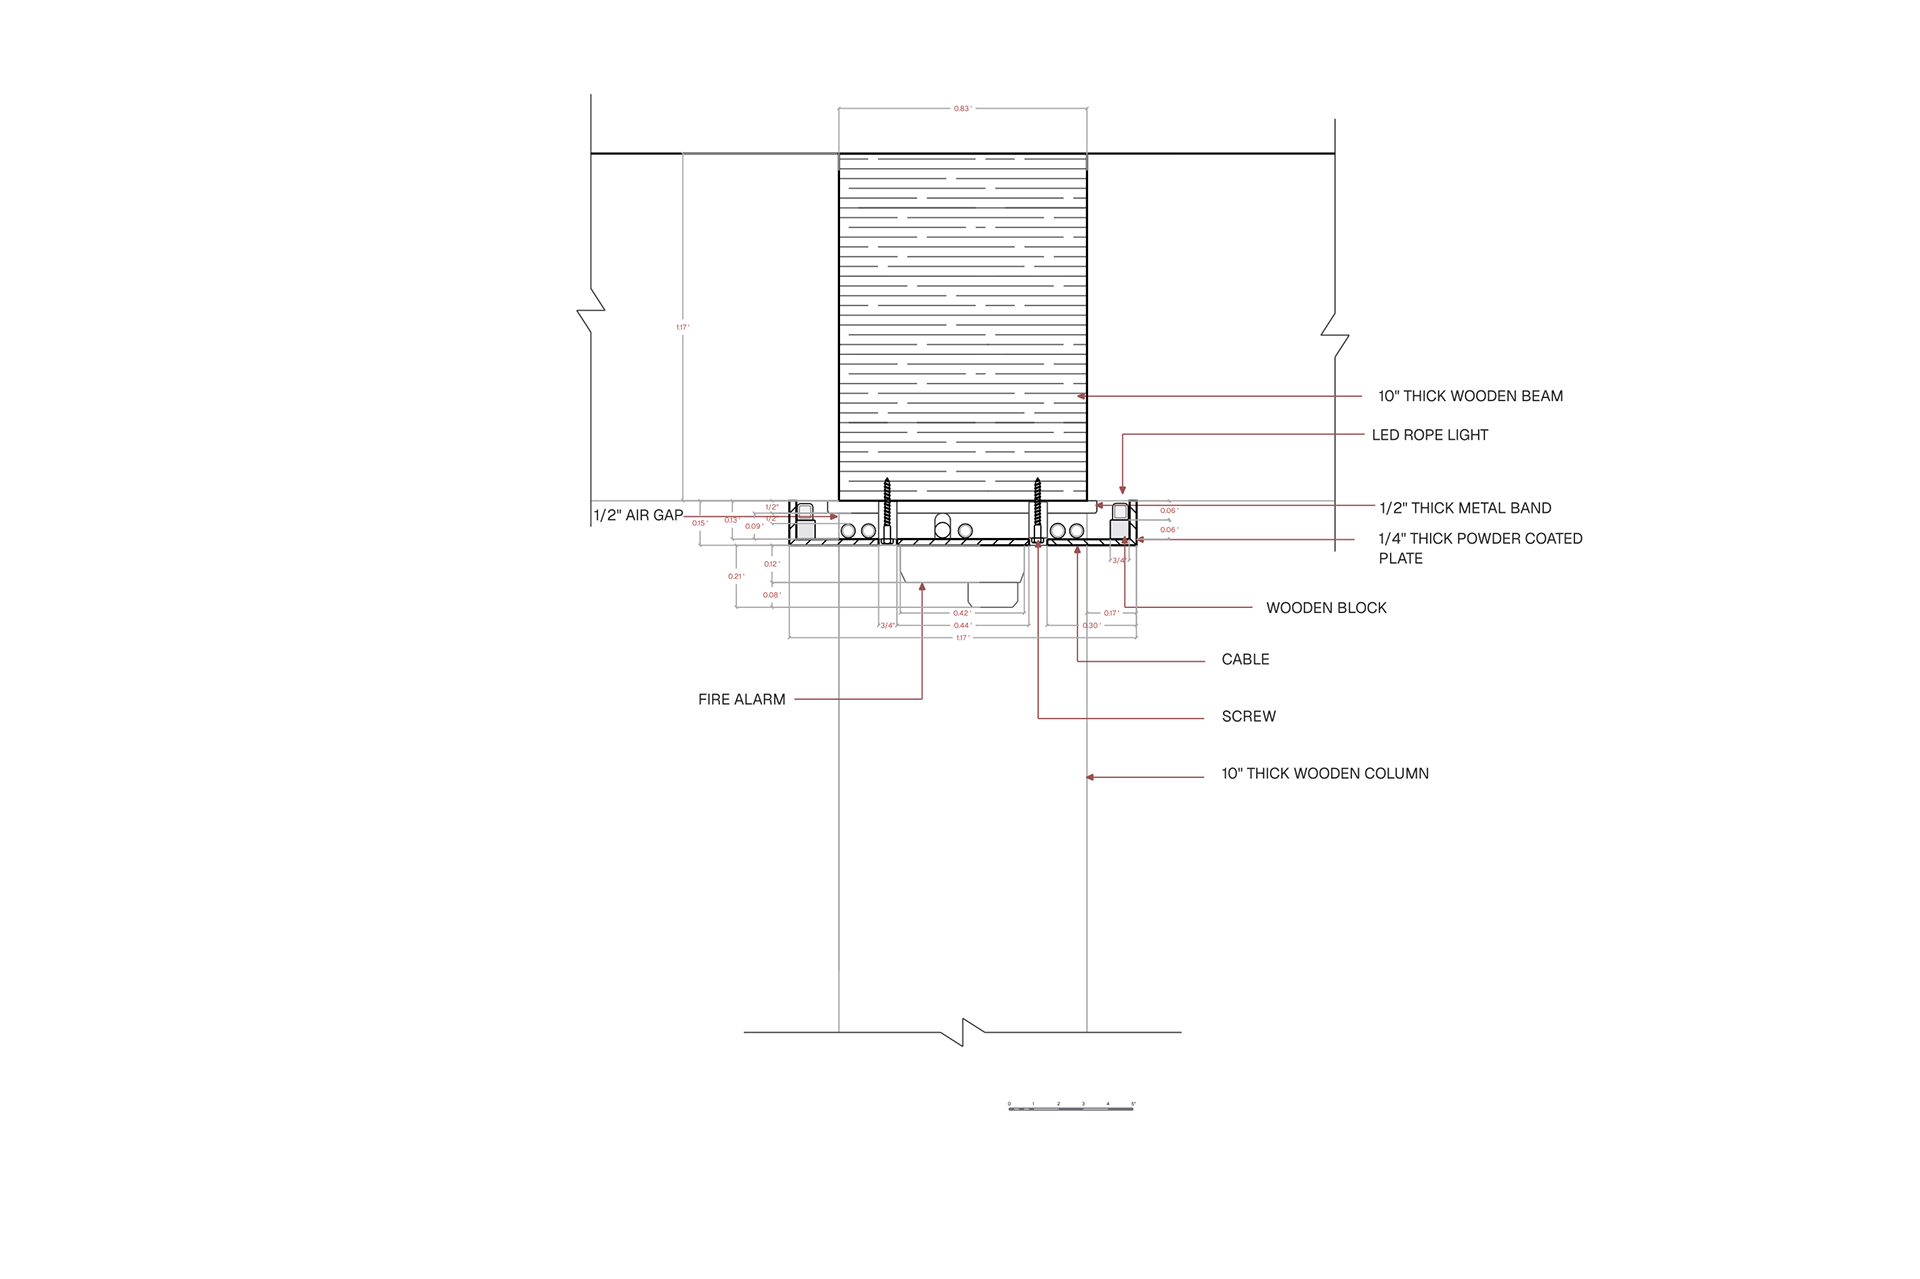
Cove Light Detail
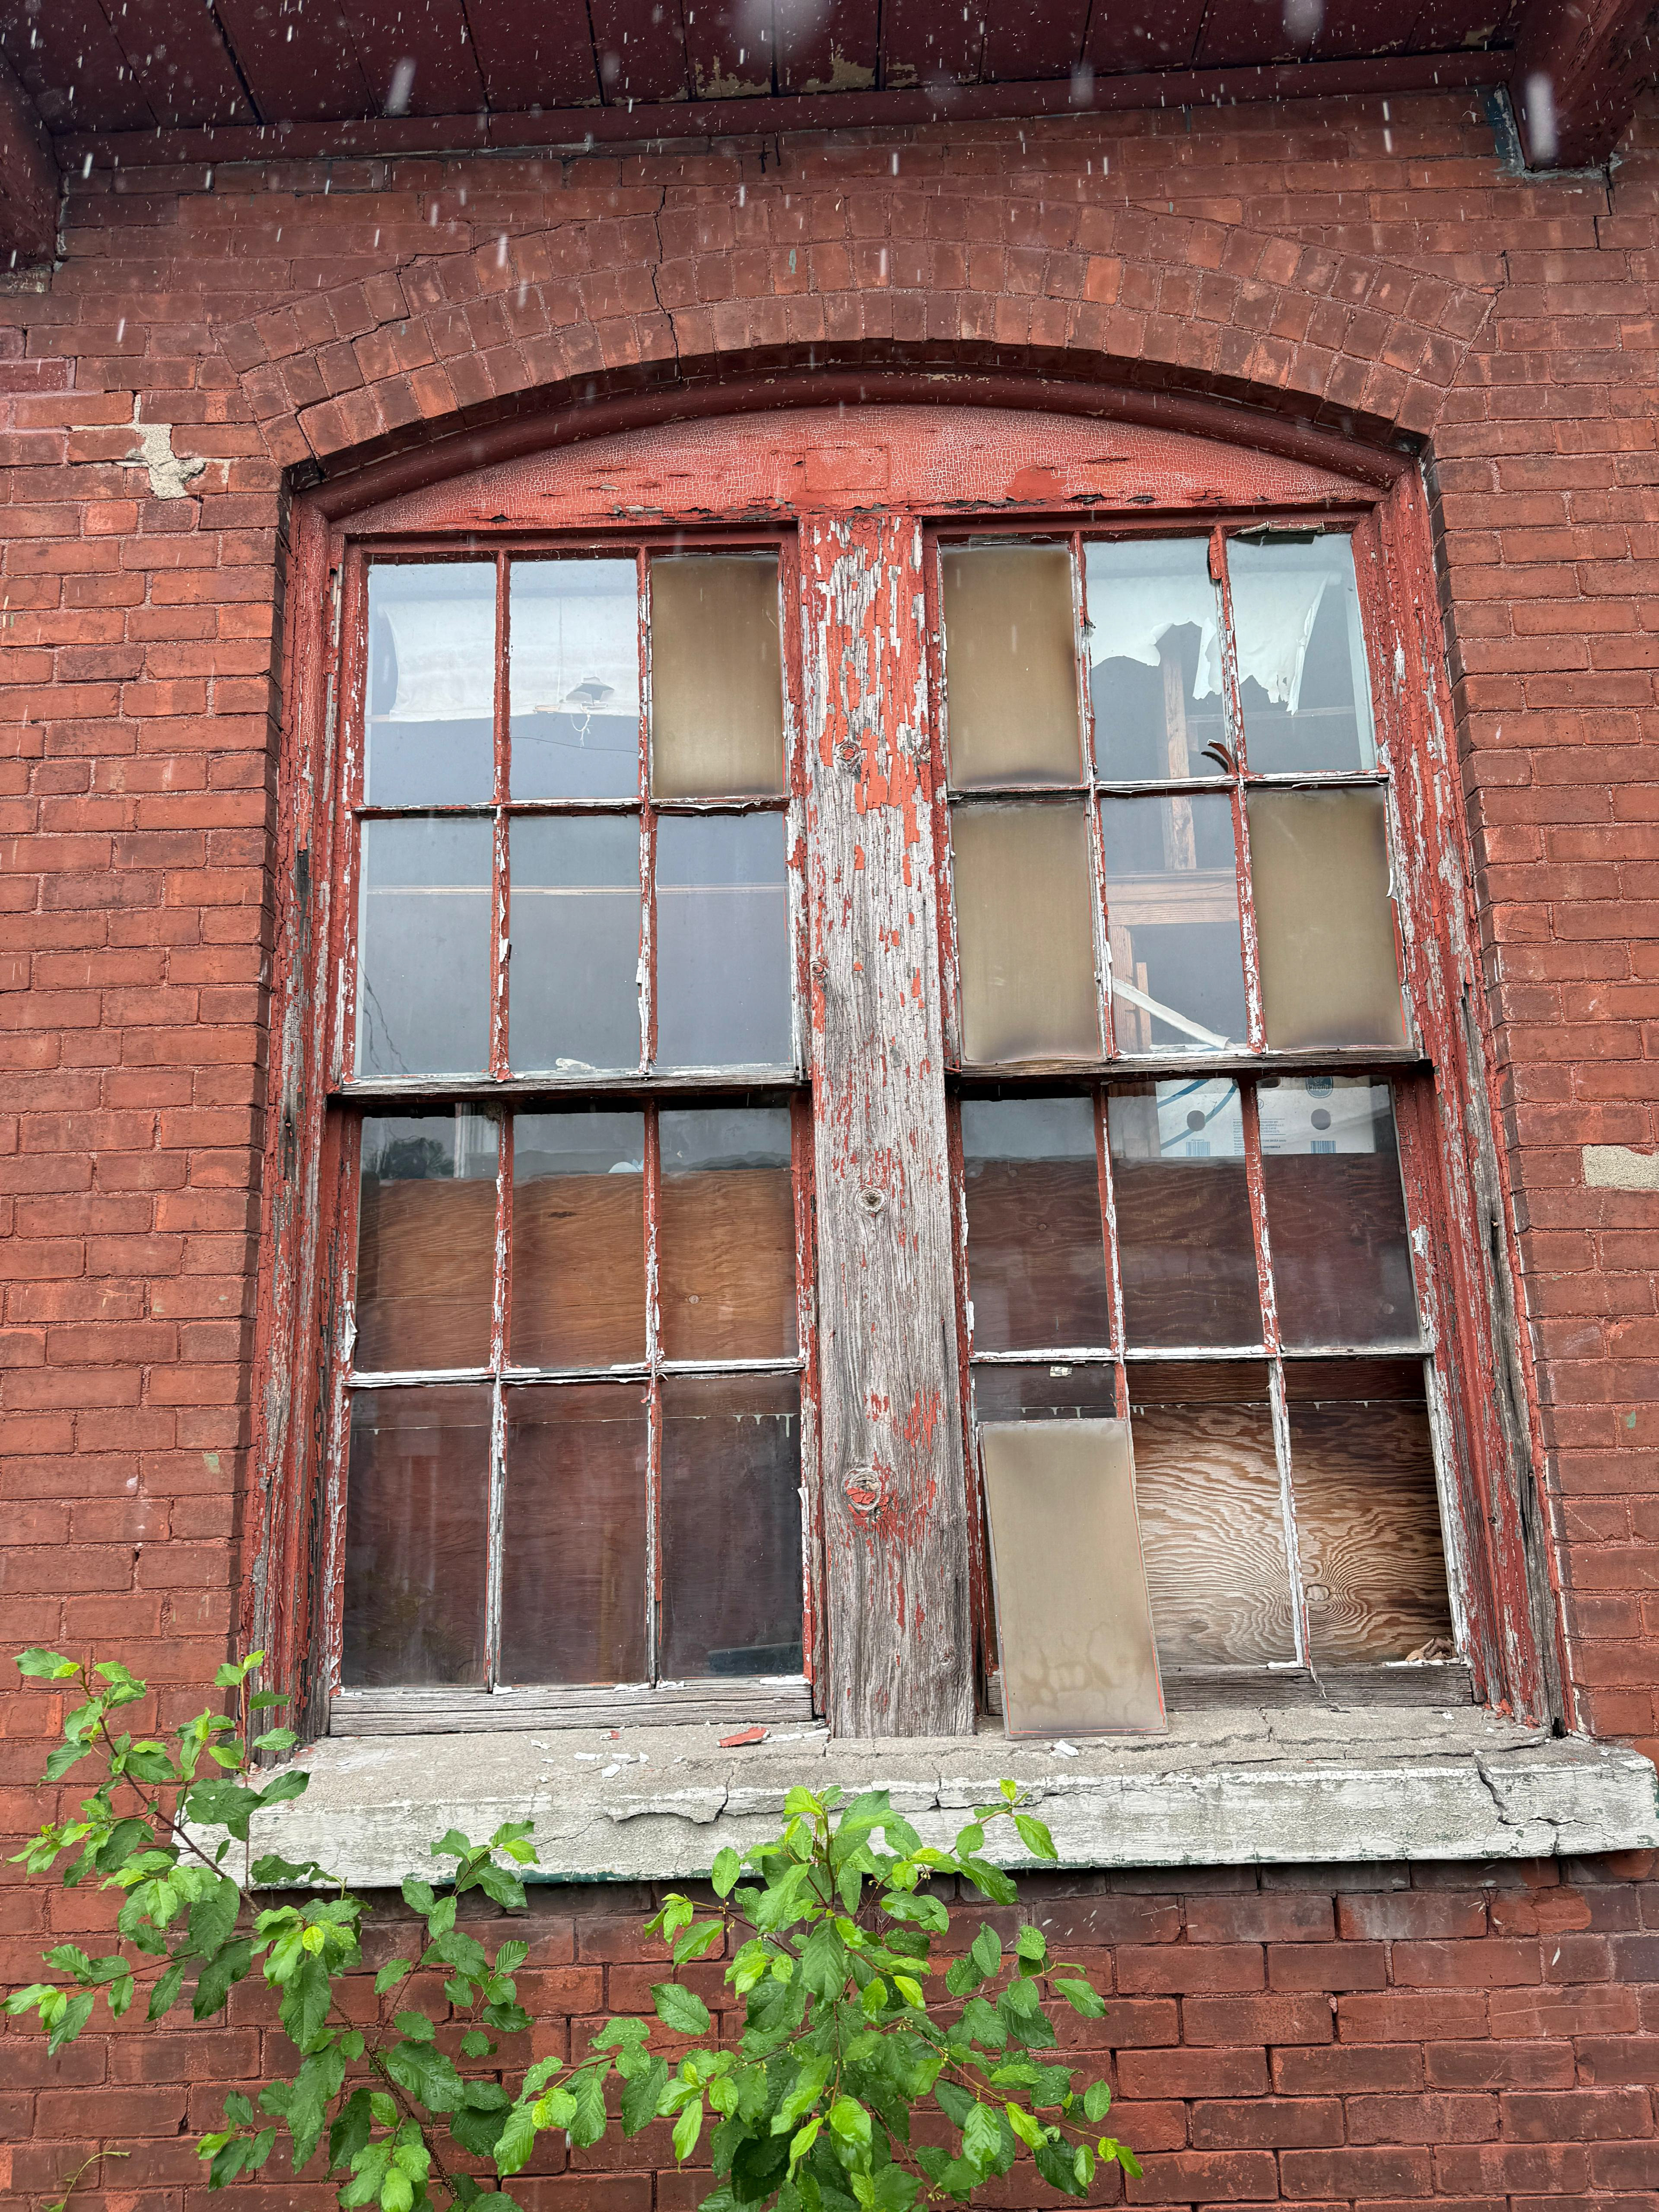
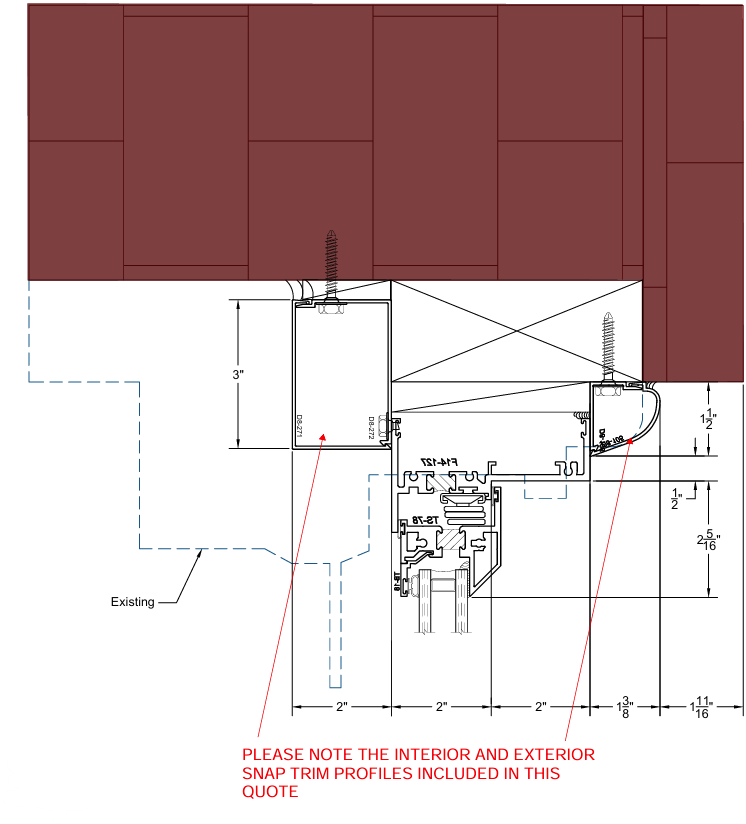
Existing Window

Window Detail